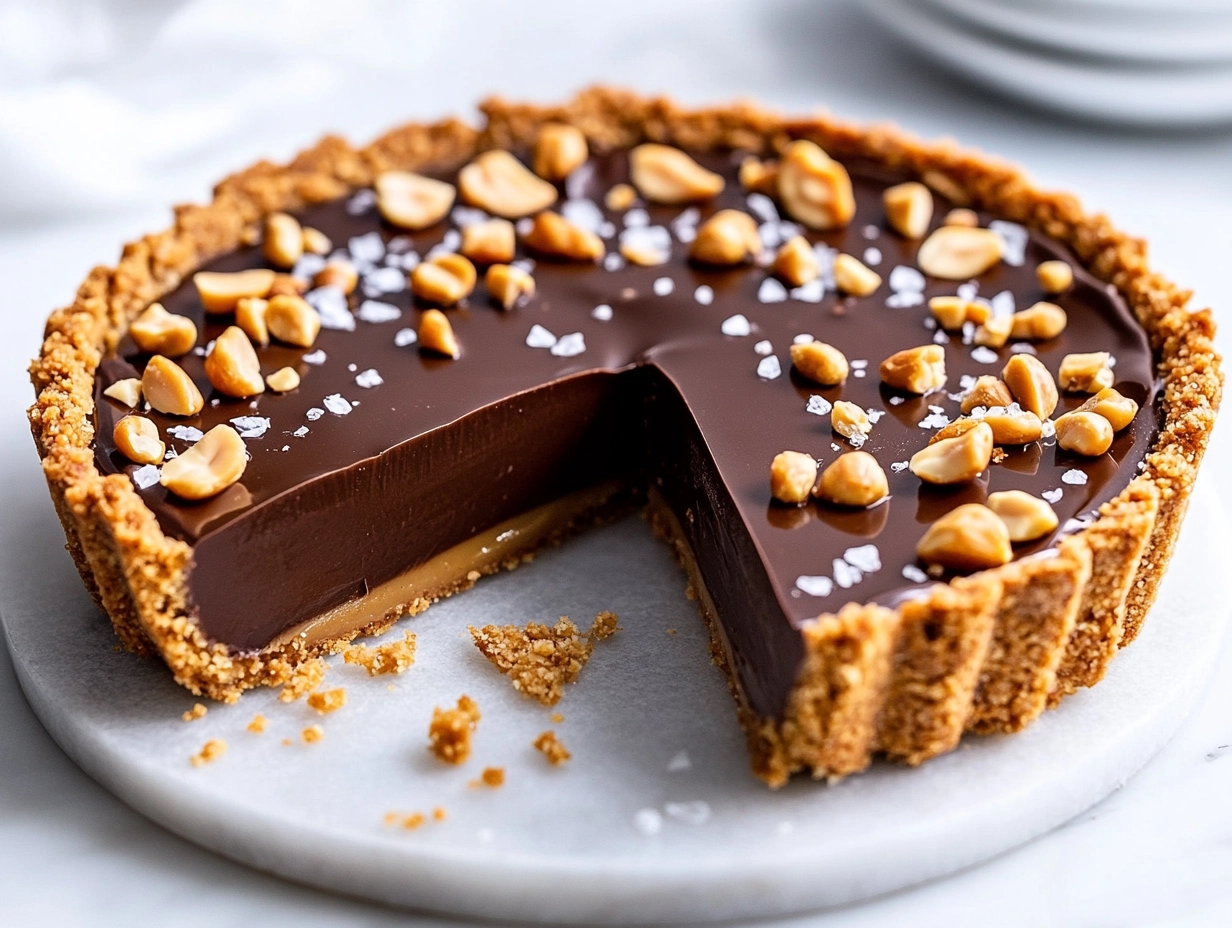
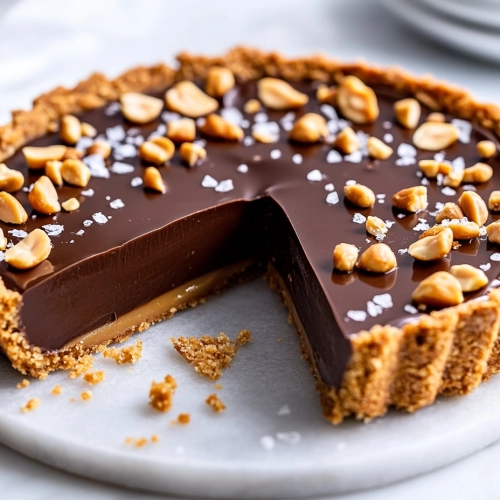
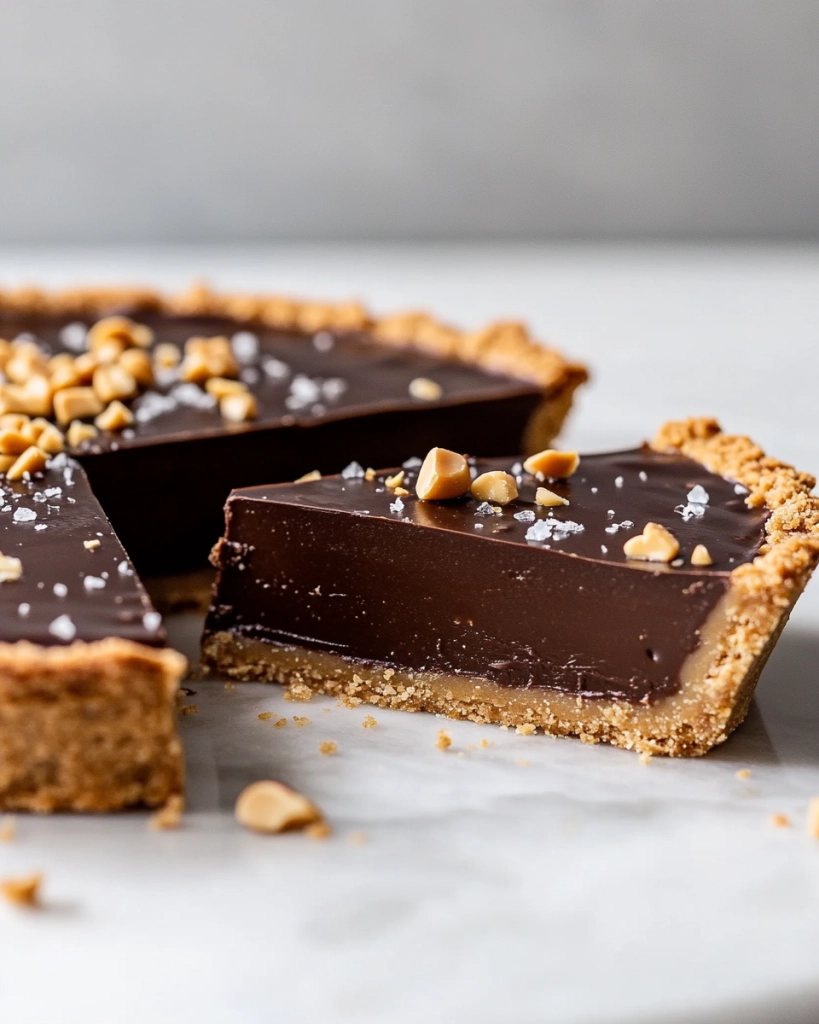
This tart isn’t just about chocolate and peanut butter. It’s about the way the rich, silky chocolate melds with the salty crunch of peanuts, all nestled in a buttery crust that gives way under your fork.
I love how the aroma of melting chocolate mingles with roasted peanut scent, filling the kitchen with a tempting, cozy smell. It’s a dessert that feels like a small celebration, made for slow savoring.
Focusing on the sensory journey of the tart—how each bite feels and tastes—making it a celebration of textures and flavors.
Why This Tart Matters to Me
- I love how the filling stays silky even after chilling.
- There’s a nostalgic joy in biting into that crunchy peanut topping.
- I’ve made this tart for friends and watched them savor every bite.
- It’s a good project for a lazy weekend afternoon—rewarding and not too fussy.
A Personal Story of Comfort and Creativity
This recipe came from a moment of craving—something sweet, salty, and rich. I wanted a dessert that’s quick to assemble but feels indulgent. I remember making it in a tiny apartment kitchen, feeling proud watching the filling set perfectly in the fridge. It’s become a go-to for casual dinner parties because everyone loves that combo of chocolate and peanut butter.
The Curious Origins of the Chocolate Peanut Butter Pairing
- This type of tart is inspired by classic French chocolate desserts but with a playful American twist.
- Peanut butter became popular in the U.S. around the early 20th century, lending its flavor to countless desserts.
- The combination of chocolate and peanut butter gained fame through American candy bars like Reese’s.
- Using crunchy peanut butter adds texture, while smooth gives a more decadent feel.
Ingredient Insights: Making It Perfect

- Chocolate: I prefer dark, 70% cacao—rich, slightly bitter, perfect for balancing sweetness.
- Peanut Butter: Use natural, creamy peanut butter for authentic flavor and smooth texture.
- Butter: Adds richness and helps bind the crust; swap with coconut oil for dairy-free.
- Cookies: Use graham crackers or digestives for a different flavor; they provide a buttery crunch.
- Sea Salt: Enhances sweetness and adds depth; flaky sea salt is best for finishing.
Spotlight on Chocolate and Peanut Butter
Chocolate:
- Melts into a glossy, velvety layer that coats your palate with deep cocoa flavor.
- It melts smoothly when warmed, then sets into a firm, shiny surface.
- Keep it at just the right temperature to avoid seizing or graininess.
Peanut Butter:
- Oozes out of the jar with a nutty aroma, inviting and warm.
- It’s thick and sticky, but melts into the chocolate with gentle warming.
- Use natural peanut butter for a richer, less processed flavor.
Smart Substitutions for Different Diets and Tastes
- Dairy-Free: Swap regular butter for coconut oil—adds a subtle coconut flavor and a slightly softer crust.
- Sugar-Free: Use a natural sweetener like honey or maple syrup in the crust, but expect a different crumb texture.
- Gluten-Free: Replace cookies with gluten-free graham crackers or almond meal.
- Nut-Free: Use sunflower seed butter instead of peanut butter for nut allergies.
- Vegan: Use plant-based butter or coconut oil and ensure your chocolate is dairy-free.
Equipment & Tools
- Springform pan: Easy removal and clean edges
- Heatproof bowl: Melting chocolate and mixing ingredients
- Spatula: Smoothing the filling and crust
- Measuring cups and spoons: Accurate ingredient measurement
- Oven: Baking the crust
- Refrigerator: Setting the tart
Making the Perfect Chocolate Peanut Butter Tart: A Step-by-Step Guide
- Preheat your oven to 180°C (350°F).
- Press the crushed cookies and butter into the tart pan, then bake for 10 minutes until golden.
- Let the crust cool completely while you melt the chocolate and warm the peanut butter.
- Pour the melted chocolate into a mixing bowl, stir in peanut butter until glossy and smooth.
- Pour the filling into the cooled crust, smoothing the top with a spatula.
- Chill in the fridge for at least 2 hours, until firm and shiny.
- Before serving, sprinkle with flaky sea salt or drizzle with extra melted chocolate.
Chill the tart for at least 2 hours, then serve directly from the fridge. Garnish with chopped peanuts or a drizzle of melted chocolate if desired.
How to Know It’s Done
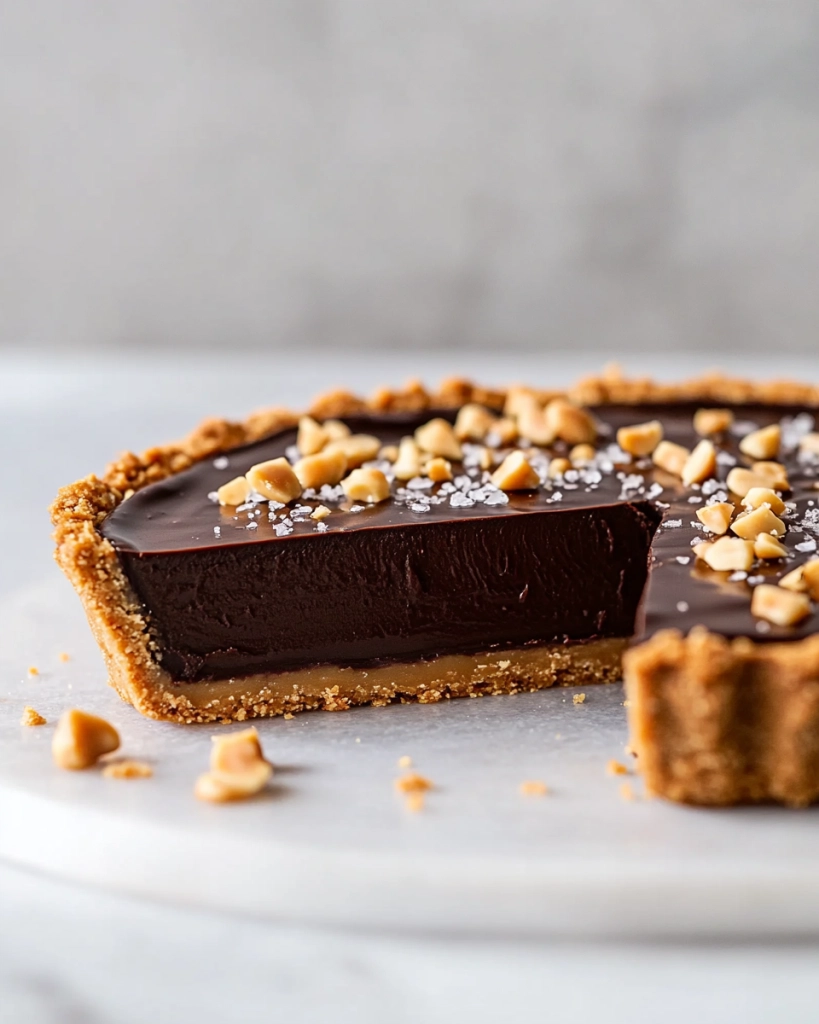
- Filling is shiny and smooth, no streaks.
- Crust is golden and crisp, not soggy.
- The tart is set but still slightly jiggles in the center when gently shaken.
Chocolate Peanut Butter Tart
Equipment
- Springform Pan
- Heatproof Bowl
- Spatula
- Measuring cups and spoons
- Oven
- Refrigerator
Ingredients
- 1 1/2 cups graham cracker crumbs or digestive biscuits, crushed finely
- 6 tablespoons unsalted butter melted
- 200 g dark chocolate 70% cacao, chopped
- 1/2 cup natural peanut butter smooth variety
- 1 cup peanuts crushed or chopped for topping
- flaKY sea salt for sprinkling on top
Instructions
- Preheat your oven to 180°C (350°F). In a bowl, mix the graham cracker crumbs with melted butter until the mixture resembles wet sand. Press this mixture firmly into the bottom of a springform pan, creating an even crust. Bake for 10 minutes until golden, then set aside to cool completely.
- Place the chopped dark chocolate in a heatproof bowl. Melt it gently over a double boiler or in short bursts in the microwave, stirring until smooth and glossy. The chocolate should be warm but not hot to prevent seizing.
- Warm the peanut butter slightly in the microwave or over a hot water bath so it becomes pourable and smooth. Add the warm peanut butter to the melted chocolate and stir together until the mixture is glossy and well combined. The aroma should be rich and inviting.
- Pour the chocolate and peanut butter mixture over the cooled crust, using a spatula to spread it evenly and smooth the top. The filling should look shiny and velvety as it settles into the crust.
- Sprinkle the crushed peanuts evenly over the top of the filling for added crunch and flavor. Finish with a light sprinkle of flaky sea salt to enhance the sweet and salty contrast.
- Place the tart in the refrigerator and chill for at least 2 hours, or until the filling is firm and shiny. This allows the flavors to meld and the surface to set beautifully.
- Once set, carefully remove the tart from the springform pan. Slice with a sharp knife, wiping the blade clean between cuts for neat slices. Serve chilled, and enjoy the rich, creamy texture with crunchy topping.
Pro Tips for a Flawless Tart
- BASE: Use a food processor for even, fine cookie crumbs.
- TEXTURE CONTROL: Press the crust firmly for a compact, even base.
- TEMPERATURE: Keep the chocolate warm but not hot to prevent seizing.
- FLOURISH: Decorate with extra drizzles or chopped nuts for visual appeal.
- CHILLING: Chill the tart in a cool, draft-free fridge to set the filling properly.
Common Pitfalls and How to Fix Them
- FORGOT TO CHILL? → Place the tart in the freezer for 15 minutes to firm up quickly.
- DUMPED TOO MUCH SALT? → Wipe excess salt off with a paper towel before serving.
- OVER-TORCHED CHOCOLATE? → Drop the bowl into a cool water bath to stop the cooking.
- FILLING IS GRAINY? → Warm the mixture slightly and whisk vigorously.
Fast Fixes for Common Tart Troubles
- When filling cracks, gently rewarm and smooth with a spatula.
- Patch cracks with a dab of extra melted chocolate.
- When in doubt, refrigerate longer for a firmer, cleaner cut.
What to Serve With Chocolate Peanut Butter Tart
- Whipped cream
- Hot coffee
How to Prep and Store Your Tart for Maximum Joy
- Filling can be made a day in advance, kept in the fridge, and poured when ready.
- Let the tart sit at room temp for 10 minutes before slicing; this softens the filling for a cleaner cut.
10 Practical Q&As About Making a Chocolate Peanut Butter Tart
1. What kind of chocolate should I use for the filling?
Use good quality dark chocolate for a rich, smooth filling that melts beautifully in your mouth.
2. How long do I need to chill the tart?
Chill the tart after pouring the filling for at least 2 hours, or until firm and shiny.
3. Should I warm the peanut butter before mixing?
Peanut butter can be stirred into the chocolate while warm for a glossy, well-incorporated filling.
4. Can I skip the salt topping?
A pinch of flaky sea salt on top enhances the sweet and salty contrast dramatically.
5. What’s the best pan for this tart?
Use a springform pan for easy removal and neat edges.
6. How do I prevent the crust from getting soggy?
Ensure your crust is fully chilled before adding the filling, so it doesn’t get soggy.
7. Why does my tart crack when I cut it?
If the filling cracks when you cut, it’s likely too cold; let it sit at room temp for 10 minutes.
8. Should I use natural or processed peanut butter?
Use natural peanut butter for a more authentic, less greasy flavor.
9. How can I decorate the top of the tart?
Swirl extra melted chocolate or peanut butter on top for a decorative finish.
10. How long can I keep the tart in the fridge?
Keep leftovers covered in the fridge; it stays good for up to 3 days.
Sometimes, a simple dessert like this can turn an ordinary afternoon into a memorable moment. It’s honest, approachable, and hits that sweet spot of indulgence and comfort.
No matter how many fancy recipes I try, I keep coming back to this tart—because it’s familiar, it’s satisfying, and it’s what I crave when I want something genuinely delicious.

hi there,
i’m Noah
A California-born food blogger behind Freshman Cook, whose culinary journey began in his tiny apartment kitchen.