Making a cheese ball feels like a little culinary chaos — mixing, rolling, and hoping it holds together. But once you get the hang of it, it’s a simple way to bring a bit of homemade magic to your snack table.
I love how adaptable this recipe is. It’s a blank canvas for whatever cheese or seasonings you’ve got on hand. Plus, it’s just satisfying to roll a smooth, fragrant ball and see everyone’s eyes light up.
A cook’s honest notes on crafting a cheese ball with a focus on texture and flavor balance.
Why this cheese ball is my comfort food
- I love how forgiving this recipe is — a splash more cheese, a pinch more herbs, and it still works.
- Rolling the coating feels oddly satisfying, like giving the cheese a little outfit.
- I’ve had moments where I forget to chill it long enough, and it falls apart. Patience is key.
- This simple dish reminds me of childhood parties and family gatherings.
My accidental cheese ball inspiration
A few years ago, I was scrambling to put together a snack for a last-minute get-together. I had some cheese, nuts, and herbs, and suddenly, the idea of a cheese ball clicked. It’s become a go-to when I want something quick that feels special. Making this cheese ball is less about perfection and more about the process a little messy, a little improvisational, but always delicious. It’s a dish that invites creativity and personal touches, which is what makes it truly ours.
A little cheese ball history and fun facts
- The cheese ball dates back to the 1800s, originally a festive party appetizer in the U.S.
- It was once considered a symbol of hospitality and often served at potlucks and gatherings.
- The name ‘cheese ball’ describes both the shape and the playful, approachable nature of this dish.
- Creative coatings like sesame seeds, crushed pretzels, or candied pecans are modern twists.
Breaking down the key ingredients

- Cream Cheese: I love its silky, tangy richness. Swap with mascarpone for extra creaminess, but reduce moisture accordingly.
- Cheddar: Sharp and crumbly, it melts beautifully. Use smoked cheddar for a smoky twist or a milder cheese for subtlety.
- Nuts: Toasted pecans or walnuts add crunch and aroma. Use sunflower seeds for a nut-free version.
- Herbs: Chives or parsley brighten the flavor. Basil or dill can give a different aromatic punch.
- Spices: Garlic powder or paprika add warmth. Cayenne offers a spicy kick—adjust to taste.
Spotlight on Cheese and Nuts
Cheddar cheese:
- Cheddar: Its sharp, salty punch melts into the creamy base, adding depth and a slight stringiness.
- Watch it melt smoothly, avoiding clumping. Use freshly grated for best texture.
Pecans:
- Nuts: Toasted pecans bring a buttery crunch and rich aroma that elevates every bite.
- Keep an eye on nuts while toasting—they can go from perfect to burnt quickly.
Smart substitutions for different diets and preferences
- Dairy-Free: Use vegan cream cheese and shredded plant-based cheese for a similar creamy texture.
- Gluten-Free: Skip breadcrumbs or crackers; serve with veggie sticks or gluten-free crackers.
- Low-Sodium: Choose reduced-salt cheese and nuts, but taste and adjust seasonings.
- Spicy: Add cayenne or hot sauce to the cheese mixture for a fiery kick.
- Herb-Free: Omit herbs for a milder, more neutral flavor, perfect for sensitive palates.
Equipment & Tools
- Mixing bowl: Combine and mix cheeses and seasonings
- Spatula: Mix thoroughly and shape the cheese ball
- Cling wrap: Wrap for chilling and flavor development
- Small baking sheet: Hold the finished cheese ball
- Chopping knife: Chop herbs, nuts, or spices for coating
Step-by-step guide to crafting your cheese ball
- Gather your tools: a mixing bowl, spatula, cling wrap, and a small baking sheet.
- Combine 8 oz cream cheese (softened) with 1 cup shredded sharp cheddar in the bowl. Mix until smooth and uniform.
- Stir in 1 teaspoon hot sauce, 1/2 teaspoon garlic powder, and chopped chives if using. Taste and adjust.
- Chill the mixture for 30 minutes to firm up.
- Shape the chilled mixture into a compact ball using your hands or a spatula. Keep hands damp to prevent sticking.
- Roll the ball in chopped nuts, paprika, or herbs. Press gently to coat evenly.
- Place on a lined baking sheet. Cover loosely with plastic wrap.
- Refrigerate for another hour or more, or overnight, to meld flavors.
- Remove from fridge 15-20 minutes before serving. Serve with crackers or sliced bread.
Let the cheese ball rest in the fridge for at least 1 hour before serving. Bring to room temp for better flavor. Slice or serve with crackers directly from the fridge.
How to Know It’s Done
- The cheese mixture should be firm enough to hold shape.
- The coating should stick evenly without cracking.
- The cheese ball should smell cheesy and fragrant, not sour or off.
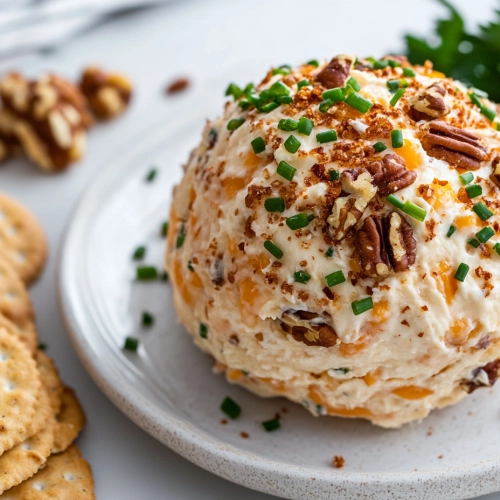
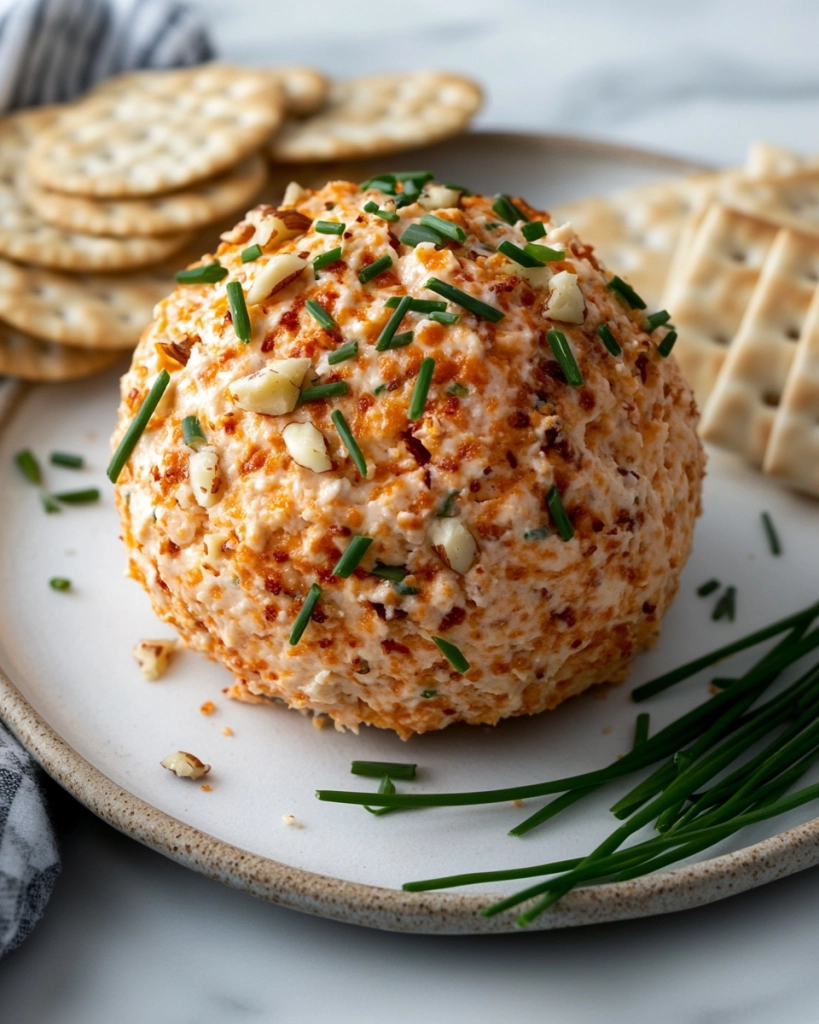
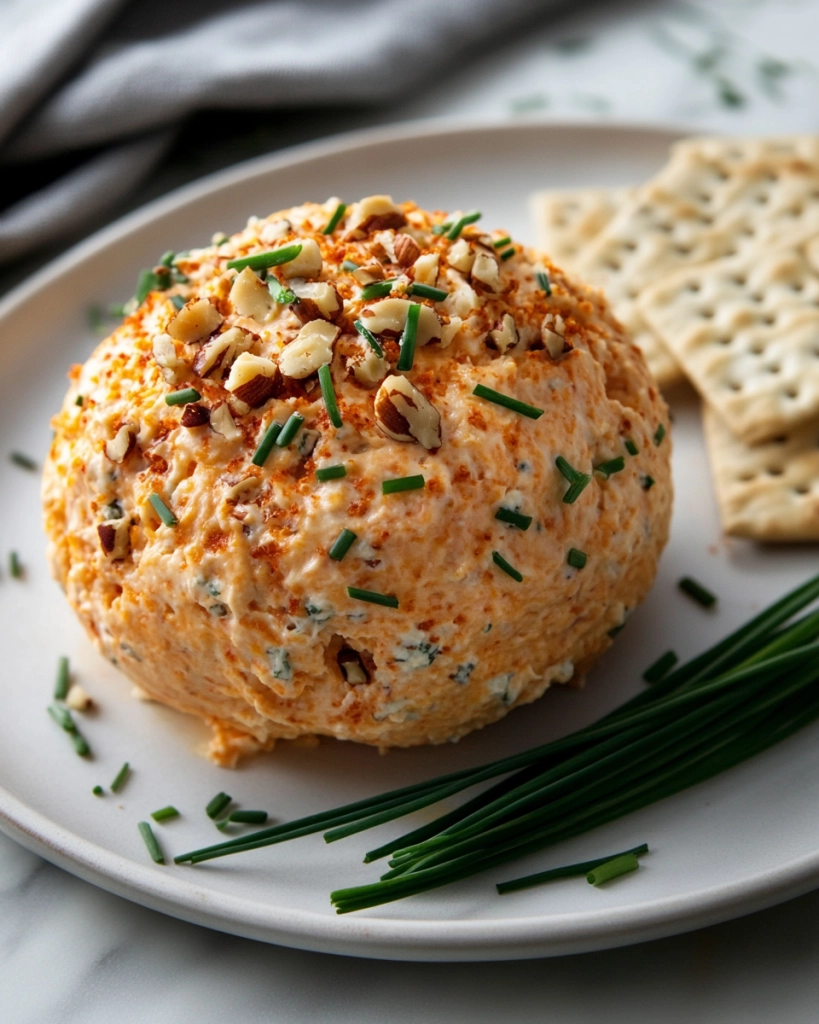
Cheese Ball
Equipment
- Mixing bowl
- Spatula
- Cling Wrap
- Small baking sheet
- Chopping knife
Ingredients
- 8 oz cream cheese softened
- 1 cup shredded sharp cheddar preferably freshly grated
- 1 teaspoon hot sauce adjust to taste
- 0.5 teaspoon garlic powder
- 2 tablespoons chopped chives optional
- 0.5 cup chopped toasted pecans or walnuts
- 1 teaspoon paprika for coating
Instructions
- Place the softened cream cheese and shredded cheddar in a mixing bowl and stir together with a spatula until smooth and creamy, with no lumps.
- Add hot sauce, garlic powder, and chopped chives to the cheese mixture, then fold everything together thoroughly, ensuring the flavors are evenly incorporated.
- Cover the bowl with cling wrap and refrigerate for about 30 minutes to firm up the mixture, making it easier to shape.
- Once chilled, scoop the mixture onto a clean surface and gently mold it into a compact round ball using your hands or a spatula. Keep your hands damp to prevent sticking and help shape smoothly.
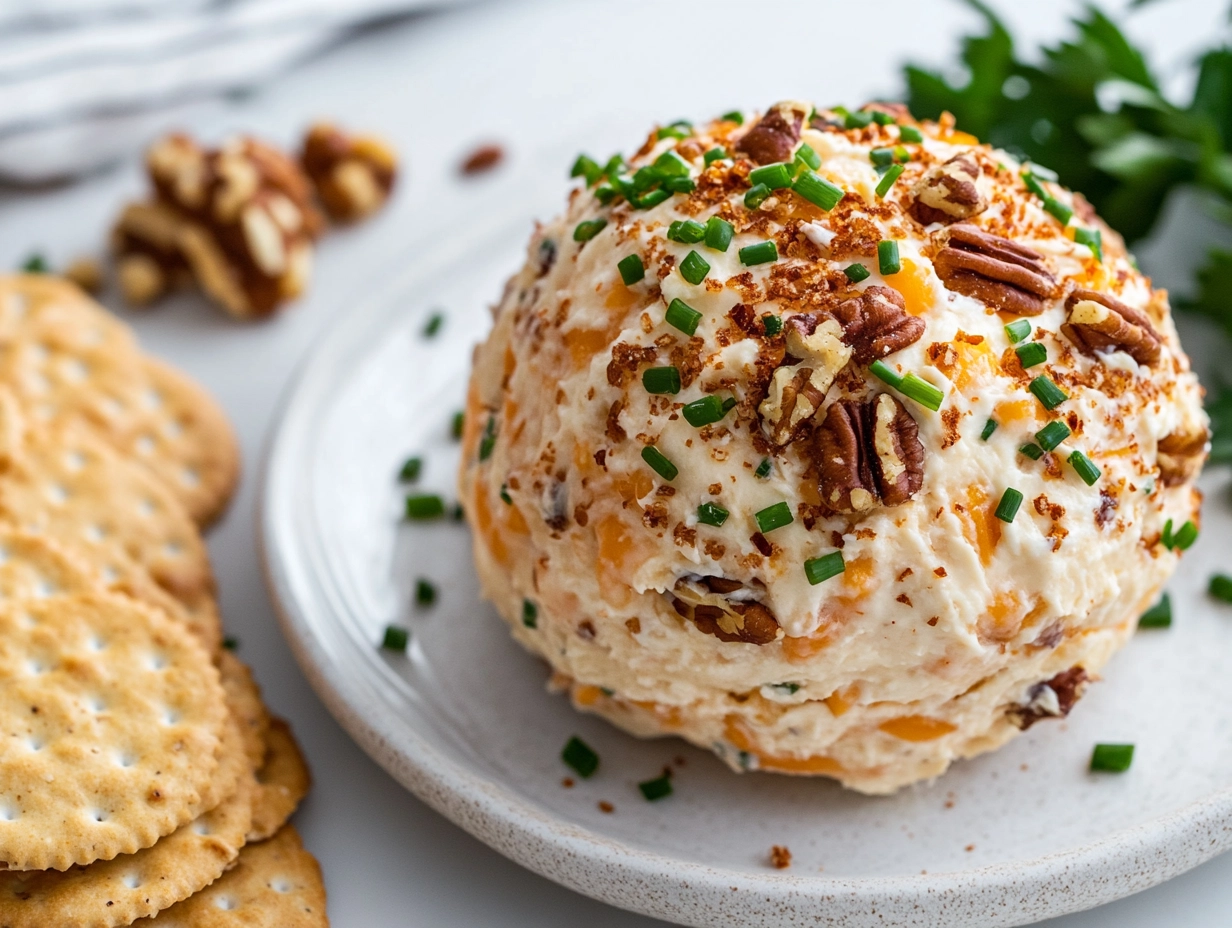
- Spread the chopped toasted pecans and paprika on a small plate. Roll the cheese ball in the nuts, pressing gently to ensure an even coating around the entire surface.
- Place the coated cheese ball on a lined baking sheet and loosely cover with plastic wrap.
- Refrigerate the cheese ball for at least another hour or ideally overnight to allow the flavors to meld and the texture to firm up further.
- About 15-20 minutes before serving, remove the cheese ball from the fridge to bring it to room temperature for the best flavor and texture.
- Serve the cheese ball with crackers, sliced baguette, or veggie sticks for dipping and enjoy its creamy interior with a crunchy exterior.
Essential tips and tricks for a perfect cheese ball
- Use ROOM TEMPERATURE cheese to mix easily and avoid lumps.
- Chill the mixture thoroughly to make shaping effortless.
- Gently press coatings to help them adhere better.
- For extra flavor, toast nuts or herbs slightly before coating.
- Use a damp spatula or hands for smooth shaping—dampness prevents sticking.
Common pitfalls and how to fix them
- FORGOT TO CHILL: Chill the mixture longer or it’ll be too soft to shape—stick it back in the fridge.
- DUMPED TOO MUCH NUTS: Use a gentle press to help coating stick. Add a little cream cheese if needed.
- OVER-TORCHED COATING: Keep a close eye if roasting nuts or herbs; burnt flavors ruin the bite.
- CRACKS IN THE BALL: Chill it longer, and handle gently while shaping. Keep hands damp to prevent cracks.
Fast fixes for common issues
- When the mixture is too soft, chill it for 30 minutes longer.
- Splash a bit more cream cheese if the mixture cracks during shaping.
- Patch cracks with extra coating or a dab of cream cheese.
- Shield the coating from burning by stirring nuts constantly during toasting.
- When in doubt, serve with a side of fresh herbs for added brightness.
What to Serve With a Cheese Ball?
- Ritz crackers
- French bread slices
- Pretzel sticks
- Sliced baguette
- Cucumber slices
Make-ahead tips and storage advice
- Prep the mixture and shape the cheese ball up to 24 hours ahead. Keep tightly wrapped in the fridge.
- Coatings like nuts or herbs can be prepared a day in advance as well.
- Flavors deepen overnight, making it even more flavorful the next day.
- Reheat? Serve cold or at room temperature; no reheating needed. Keep refrigerated.
10 Practical Q&As About Making the Perfect Cheese Ball
1. What cheeses should I use for the best flavor and texture?
Use a mix of sharp cheddar and cream cheese for a tangy, creamy base. Cheddar adds depth, while cream cheese keeps it smooth.
2. How long should I refrigerate the mixture before shaping?
Chill the cheese mixture for at least 30 minutes. It firms up nicely, making it easier to shape.
3. What coatings work best for the cheese ball?
Roll the cheese ball in chopped nuts, herbs, or paprika. It adds crunch, color, and flavor contrast.
4. What’s the best way to serve the cheese ball?
Serve with crisp crackers or sliced baguette. The crunch complements the creamy cheese.
5. How do I shape the cheese ball without it falling apart?
Use a small, sturdy spatula or your hands for shaping. Keep your hands damp to prevent sticking.
6. Can I prepare the cheese ball in advance?
Make it a day ahead. The flavors meld overnight, and it’s easier to handle when chilled.
7. How should I store leftovers?
Store it wrapped tightly in plastic wrap. Keeps fresh and prevents it from drying out.
8. When should I take it out of the fridge before serving?
Allow it to come to room temperature for about 15-20 minutes before serving for optimal flavor.
9. How do I customize the flavor?
Adjust the seasonings to taste: add more herbs or spices depending on your preference.
10. How can I enhance the flavor and texture?
Use fresh herbs for brightness, and toast nuts for extra aroma and crunch.
This cheese ball isn’t just a party starter — it’s a reminder that the best snacks come from honest hands and simple ingredients. It’s perfect for those lazy weekends or last-minute gatherings, when you want something crowd-pleasing but not complicated.
And honestly, once you get the hang of mixing and coating, you’ll find yourself turning it into a signature dish, tweaking the cheeses and toppings to match your mood. It’s a humble, versatile little thing, but it carries a lot of good times inside.
hi there,
i’m Noah
A California-born food blogger behind Freshman Cook, whose culinary journey began in his tiny apartment kitchen.