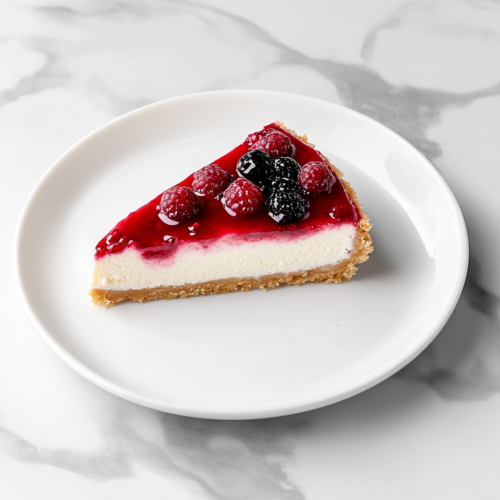
This Easy Summer Berry Cheesecake is everything you love about cheesecake with a vibrant twist of fresh, juicy berries!
It starts with a buttery graham cracker crust, a creamy cheesecake filling, and a luscious layer of mixed berries that make every slice a burst of flavor.
Whether it’s strawberries, blueberries, raspberries, or blackberries, the combination adds a delightful tangy-sweet balance that makes this dessert absolutely irresistible.
Perfect for summer gatherings or a holiday feast, this cheesecake is a crowd-pleaser.
Pair it with a refreshing glass of Sangria or a colorful bowl of Fruit Salad for a dessert spread that’s as beautiful as it is delicious.
What Makes This Recipe Special?

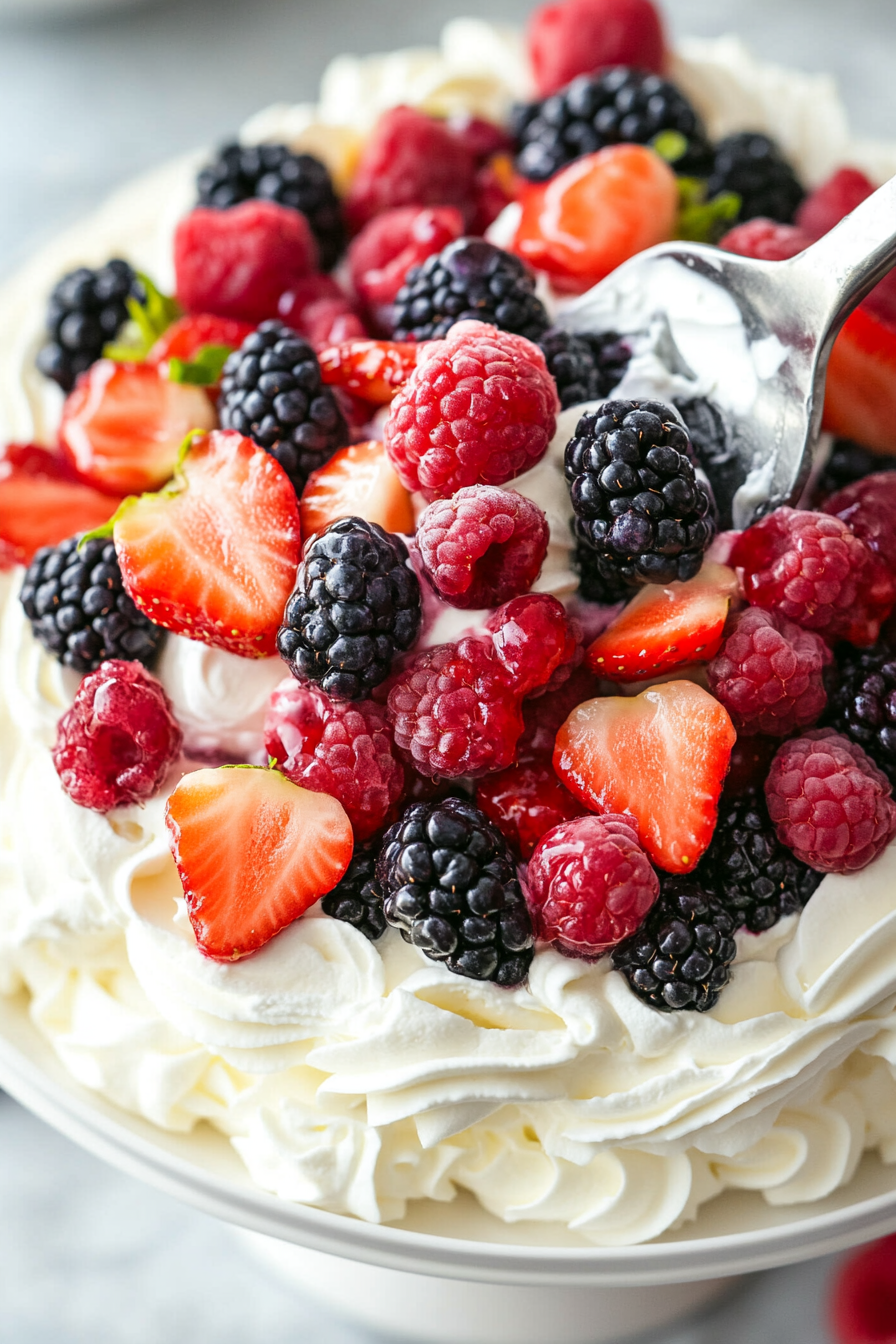
- Berry explosion: The mix of berries adds a tangy sweetness that perfectly complements the creamy cheesecake.
- Show-stopping presentation: Topped with glistening berries, this dessert looks like it came from a bakery.
- Easy to customize: Use your favorite berries or a combination to make it your own.
- Make-ahead friendly: It’s even better when chilled overnight, making it perfect for planning ahead.
- Seasonal favorite: Ideal for summer but adaptable for any time of year with frozen berries.
Bring a touch of elegance to your dessert table with this Easy Summer Berry Cheesecake—it’s indulgent, fresh, and unforgettable. One bite and you’ll be hooked!
Berry Bliss Cheesecake Recipe
Equipment
- 9-inch springform pan
- Parchment paper
- Large mixing bowl
- Electric mixer
- Spatula
- Fork
Ingredients
- 1 ¼ cups Honey Maid Graham Crumbs
- ¼ cup butter melted
- 2 250 g packages Philadelphia Light Brick Cream Cheese Spread, softened
- ¾ cup sugar
- 4 cups mixed fresh berries blueberries, blackberries, raspberries, strawberries
- 2 cups thawed Cool Whip Light Whipped Topping
Instructions
- Line a 9-inch springform pan with parchment paper on the bottom and sides.
- Mix graham crumbs and melted butter, then press into the bottom of the pan to form a crust.

- Beat cream cheese and sugar in a large bowl until smooth.

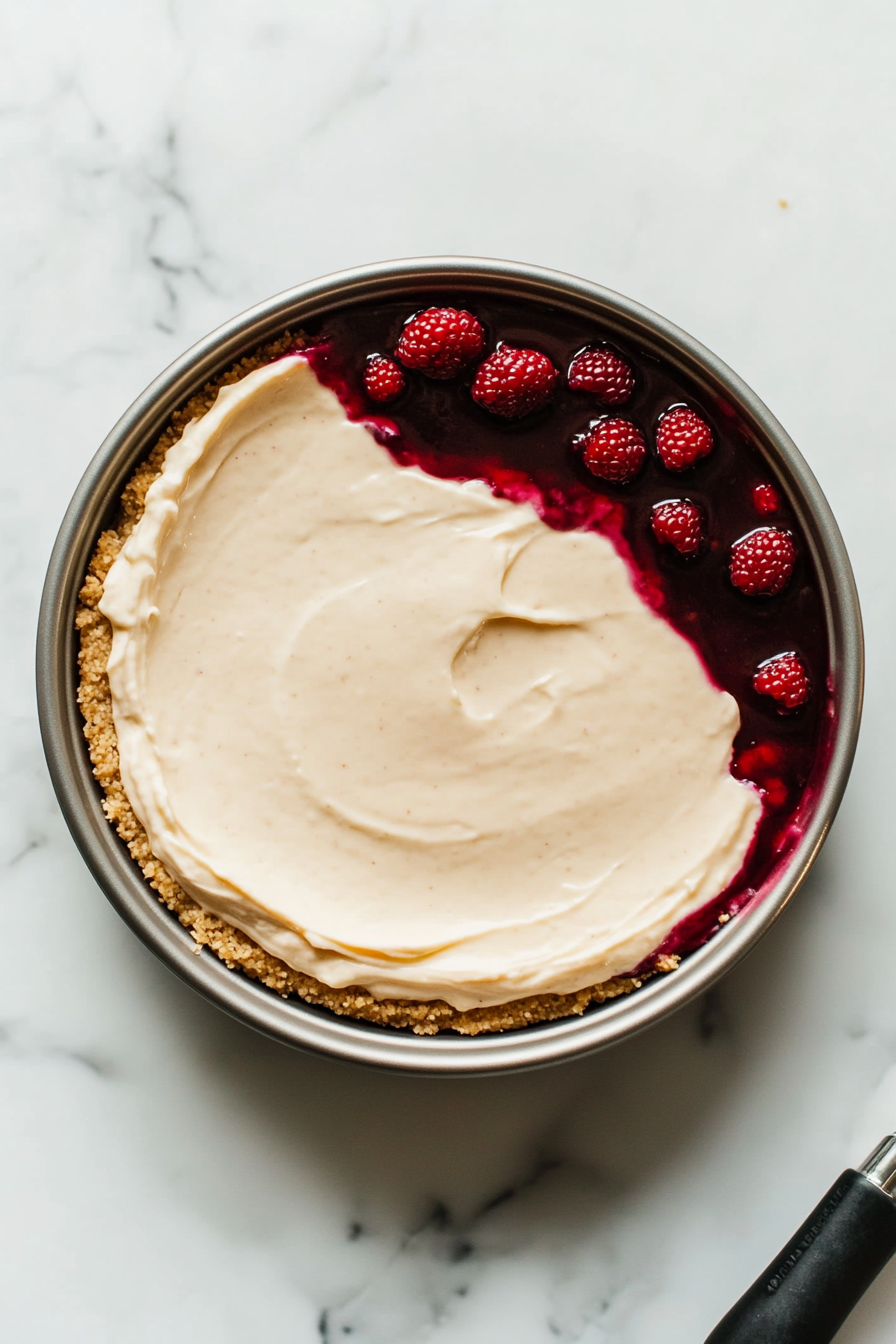
- Mash 1½ cups of berries with a fork and mix into the cream cheese mixture on low speed.
- Fold in the Cool Whip gently, then spread the mixture evenly over the crust.
- Refrigerate for 6 hours until set.
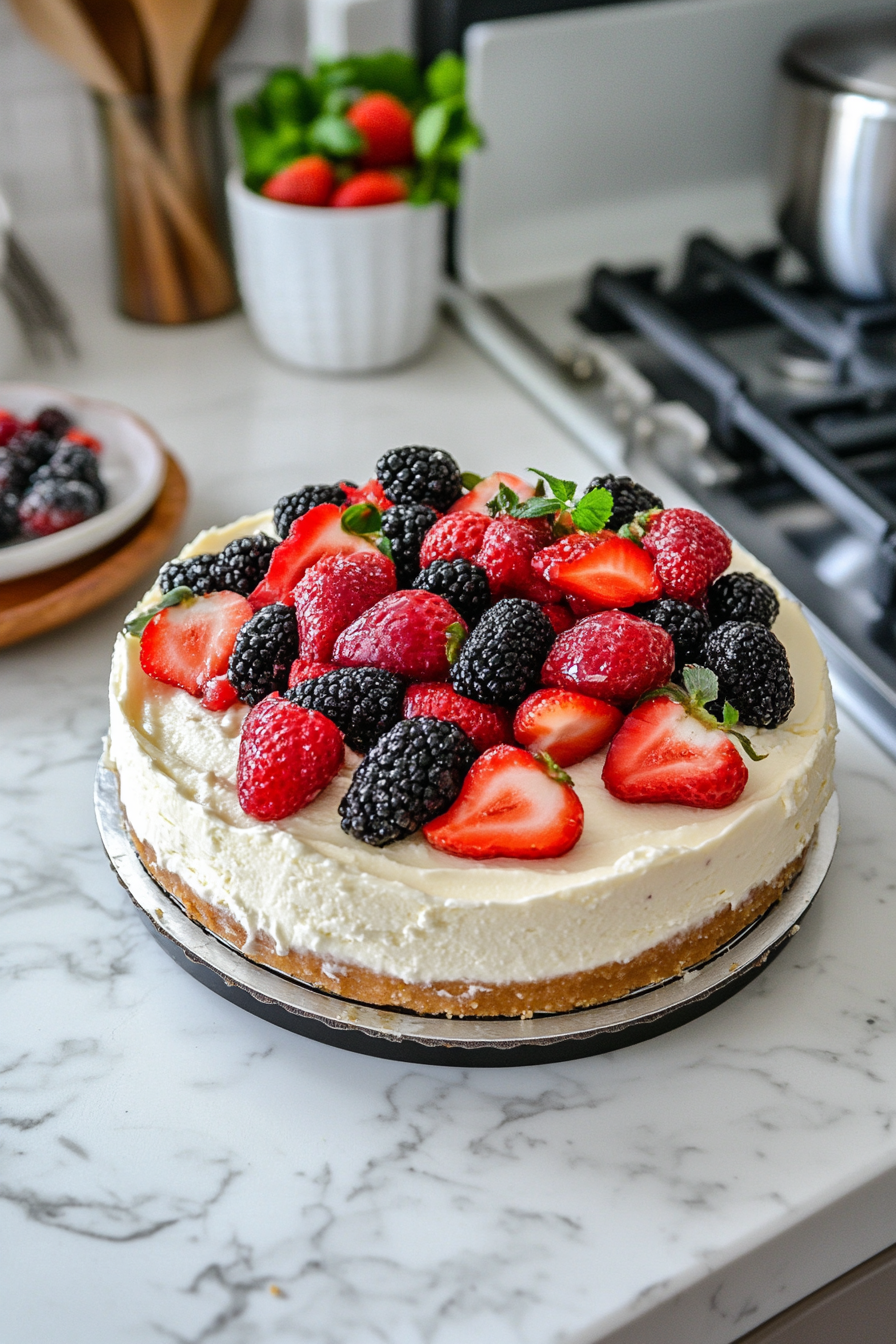
- Top with remaining fresh berries before serving.
Nutrition Facts:
Expert Tips for No-Bake Mixed Berry Cheesecake!
- Perfect Crust Consistency: When mixing the graham crumbs with melted butter, the mixture should resemble wet sand. Press it firmly into the pan using the back of a measuring cup for an even, compact base that holds together when sliced.
- Room Temperature Cream Cheese: Let the cream cheese soften at room temperature to avoid lumps in the filling. This ensures a silky-smooth texture when beaten with sugar.
- Layer for Flavor: For an extra layer of flavor, add a pinch of cinnamon or a teaspoon of lemon zest to the graham cracker crust.
- Berry Prep: Wash and pat dry the fresh berries thoroughly before using them to prevent excess moisture from seeping into the cheesecake.
- Balance Sweetness: If your berries are very tart, consider adding a tablespoon of powdered sugar to the mashed berries before mixing them into the filling.
- Gentle Folding: When folding the Cool Whip into the cream cheese mixture, use a spatula and fold gently to retain the airy texture. Overmixing can deflate the whipped topping.
- Chill for Stability: Allow the cheesecake to refrigerate for at least 6 hours, but overnight is even better. This gives it time to set fully and makes slicing cleaner.
- Decorative Berry Topping: Arrange the fresh berries in a concentric pattern for a professional-looking presentation. Brush them lightly with melted apricot jam for a glossy finish.
- Parchment Lining Tip: Extend the parchment paper slightly above the edge of the pan to make removing the cheesecake easier, especially for a clean release of the sides.
- Make It Ahead: This dessert can be made a day in advance, making it ideal for entertaining. Keep it refrigerated until just before serving.
- Optional Garnish: Add a drizzle of chocolate, a sprinkle of powdered sugar, or a few mint leaves on top for added visual appeal.
- Serving Tip: Use a sharp knife dipped in warm water (and wiped clean between cuts) to achieve neat slices.
This no-bake cheesecake is a breeze to prepare and boasts vibrant, fruity flavors that will impress any crowd!

hi there,
i’m Noah
A California-born food blogger behind Freshman Cook, whose culinary journey began in his tiny apartment kitchen.