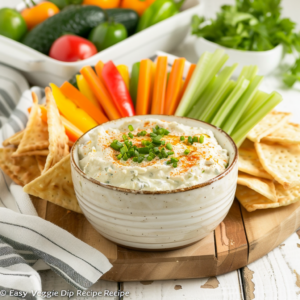
Summer appetizers are all about fresh, light flavors that come together quickly. These easy-to-make bites are perfect for warm-weather gatherings or a light snack to enjoy during the day.
From savory dips to bite-sized snacks, these appetizers are designed to bring seasonal produce and vibrant flavors to the forefront. They’re the perfect way to kick off any meal or enjoy a quick, satisfying snack.
This collection of summer appetizers features a variety of easy, fresh, and flavorful dishes that highlight the best of the season.
1. Bang Bang Chicken Skewers
Bang Bang Chicken Skewers are a fun, flavorful twist on classic grilled chicken, with juicy pieces threaded on skewers and finished with a creamy, slightly spicy sauce. The simple seasoning on the chicken lets the bold bang bang sauce shine.
These skewers are perfect for backyard barbecues, summer dinners, or easy weeknight meals when something tasty and handheld is wanted. They pair well with rice, salads, or fresh veggies for a balanced plate.
The chicken stays moist and charred on the outside, while the creamy bang bang sauce offers sweet, tangy, and spicy notes that make every bite exciting.
Servings: 2–3
Ingredients
For the Chicken Skewers:
- 1 lb boneless, skinless chicken breasts or thighs
- Salt and black pepper, to taste
- ½–1 tsp garlic powder (optional)
- ½–1 tsp smoked paprika (optional)
- 1–2 tbsp olive oil
- Wooden or metal skewers
For the Bang Bang Sauce:
- ½ cup mayonnaise
- 1–2 tbsp sriracha or hot sauce (adjust to heat level)
- 1–2 tsp honey or sugar (to taste)
- 1–2 tsp rice vinegar or lime juice
- Optional: 2–3 tbsp Greek yogurt (to lighten the sauce)
Instructions
- If using wooden skewers, soak them in water for at least 20 minutes to prevent burning.
- Cut the chicken into bite‑sized pieces and place in a bowl.
- Drizzle olive oil over the chicken and season with salt, pepper, garlic powder, and smoked paprika; toss to coat evenly.
- Thread the seasoned chicken pieces onto the skewers, leaving a little space between pieces.
- Preheat a grill or grill pan over medium‑high heat.
- Grill the chicken skewers for about 3–4 minutes per side, until the chicken is cooked through and has nice grill marks.
- Meanwhile, whisk together the mayonnaise, sriracha, honey or sugar, and rice vinegar (or lime juice) in a small bowl. Add Greek yogurt if using to lighten the sauce.
- Once the chicken skewers are done, remove from the grill and let cool slightly.
- Drizzle the bang bang sauce over the skewers or serve it on the side for dipping.
- Garnish with extra herbs or lime wedges if desired and serve warm.
2. Mini Cucumber Sandwiches
Mini Cucumber Sandwiches are a light and refreshing finger food that’s perfect for brunches, tea time, or casual gatherings. Soft bread pairs with crisp cucumber and creamy filling for a clean, cool bite that stays simple yet satisfying.
These little sandwiches are ideal when you want a snack that feels fresh and approachable without heaviness. They come together quickly and are easy to serve on a platter for guests or family.
The texture is soft and delicate with a gentle crunch from the cucumber, making each bite balanced and pleasant just right for a social setting or easy lunch.
Servings: 10–12 small sandwiches
Ingredients
- 10–12 slices white sandwich bread (crusts removed)
- 1–1½ cups thinly sliced cucumber
- ½ cup cream cheese (softened)
- 2–3 tablespoons mayonnaise (optional, for extra creaminess)
- 1 tablespoon lemon juice
- 1 tablespoon fresh dill or parsley, chopped
- Salt, to taste
- Black pepper, to taste
Instructions
- In a small bowl, mix the softened cream cheese, mayonnaise (if using), lemon juice, chopped dill or parsley, salt, and black pepper until smooth and well combined.
- Lay the bread slices flat and spread a thin layer of the cream cheese mixture on each slice.
- Arrange cucumber slices evenly over half of the bread slices.
- Place the remaining bread slices on top, cream cheese side down, to form sandwiches.
- Gently press the sandwiches together and trim off the crusts with a sharp knife.
- Cut each sandwich into quarters or small rectangles (as shown in the image).
- If desired, secure each mini sandwich with a decorative toothpick or skewer.
- Arrange on a serving platter and enjoy immediately.
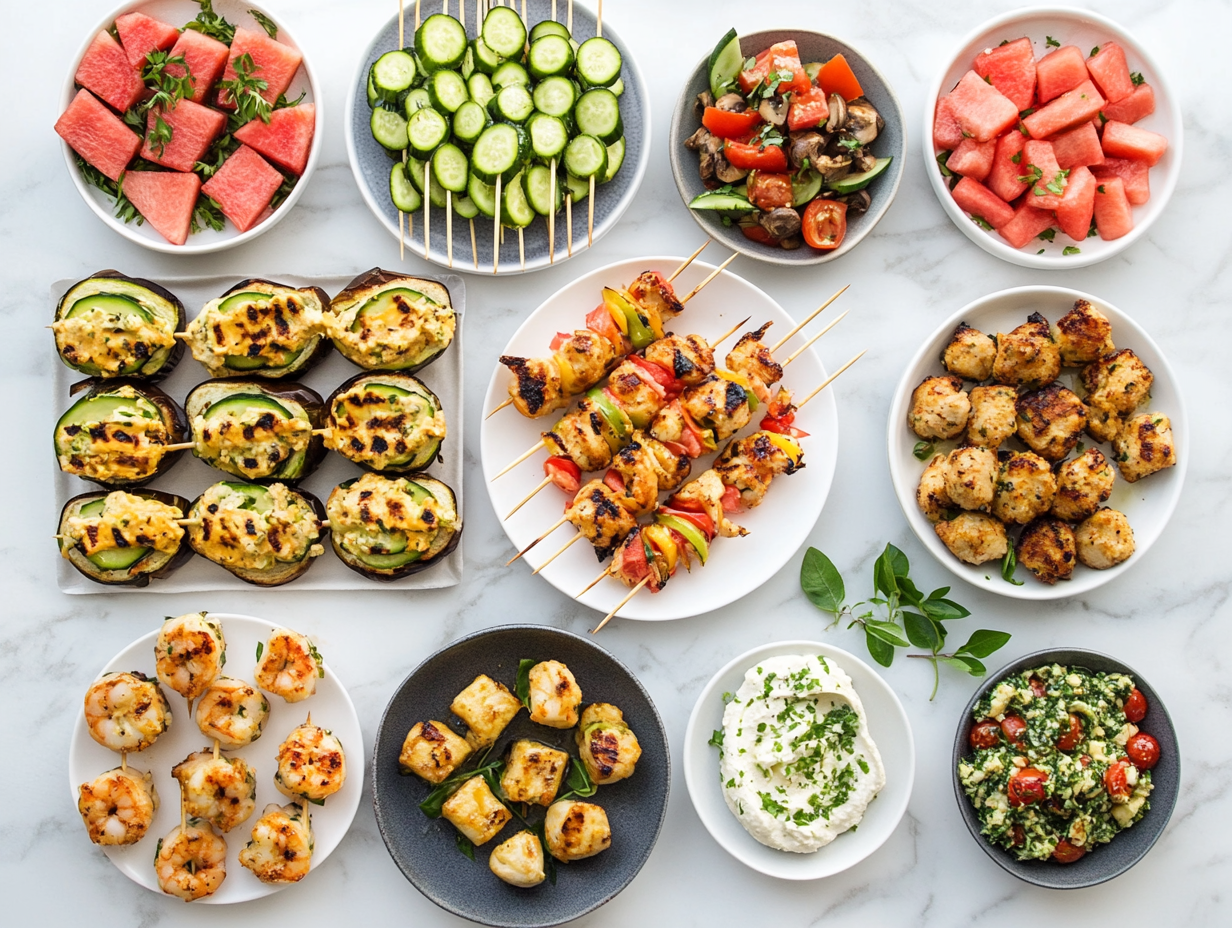
3. Grilled Shrimp with Garlic Butter
Grilled Shrimp with Garlic Butter is a flavorful and simple dish that pairs smoky, charred shrimp with a rich garlic‑butter sauce. The combination of fresh shrimp and butter seasoned with herbs and garlic makes it a crowd‑pleasing choice that doesn’t feel too heavy.
This dish works well for quick weeknight dinners, backyard cookouts, or casual gatherings when something delicious and effortless is wanted. The garlic butter elevates the natural sweetness of the shrimp without overpowering it.
With every bite, you’ll taste juicy shrimp and zesty, buttery goodness — perfect served with rice, veggies, or crusty bread to soak up the extra sauce.
Servings: 2–3
Ingredients
- 1 pound large shrimp, peeled and deveined
- 2–3 tablespoons olive oil
- Salt and black pepper, to taste
- 4 tablespoons unsalted butter
- 3–4 cloves garlic, minced
- 1 tablespoon fresh lemon juice
- 1 teaspoon paprika
- 1–2 tablespoons fresh parsley, chopped
- Optional: lemon wedges (for serving)
Instructions
- Preheat the grill to medium‑high heat and lightly oil the grill grates.
- In a large bowl, toss the shrimp with olive oil, salt, black pepper, and paprika until evenly coated.
- Thread the seasoned shrimp onto skewers (if using) or place directly on the grill.
- Grill the shrimp for about 2–3 minutes per side, until pink and cooked through; remove from the grill and set aside.
- In a small saucepan over medium heat, melt the butter.
- Add the minced garlic to the melted butter and cook for about 1 minute, stirring constantly until fragrant.
- Stir in the fresh lemon juice and chopped parsley; remove from heat.
- Pour the garlic butter sauce over the grilled shrimp and toss gently to coat.
- Serve warm with lemon wedges on the side.
4. Watermelon Feta Skewers
Watermelon Feta Skewers are a fresh and bright appetizer that combines sweet watermelon with salty feta and lively herbs. Each bite feels light, cool, and perfect for warm weather or casual gatherings.
This simple snack works well for summer parties, picnics, or easy entertaining when a colorful and refreshing bite is wanted without much effort. The pairing of sweet fruit and tangy cheese keeps the flavor balanced.
Threaded onto skewers, the contrasting textures crisp watermelon and creamy feta make each bite easy to enjoy with friends and family.
Servings: 4–6
Ingredients
- 4 cups watermelon, cut into 1‑inch cubes
- 8 ounces feta cheese, cut into similar‑sized cubes
- Fresh mint leaves
- Optional: balsamic glaze or olive oil for drizzling
Instructions
- Prepare the watermelon by cutting it into 1‑inch cubes; pat lightly with a paper towel if juicy.
- Cut the feta cheese into cubes roughly the same size as the watermelon.
- On small skewers or toothpicks, alternate threading a watermelon cube, a piece of feta, and a folded mint leaf.
- Repeat until all ingredients are used and skewers are assembled.
- Arrange the skewers on a serving platter.
- (Optional) Drizzle lightly with balsamic glaze or a touch of olive oil for extra flavor.
- Serve immediately and enjoy these refreshing watermelon feta bites.
5. Zucchini Fritters
Zucchini Fritters are a crispy, golden‑brown breakfast or snack option that highlights the mild, fresh flavor of zucchini with bright herbs and cheese. These fritters stay tender inside and have a pleasant, lightly crisp exterior that keeps every bite satisfying.
This dish is ideal for weekend brunch, a light lunch, or quick meals when something flavorful yet simple is wanted. The combination of fresh zucchini, green onions, and herbs gives them a bright, garden‑fresh taste.
Paired with a dollop of yogurt or your favorite dip, these fritters feel both wholesome and delicious perfect for enjoying warm with friends or family.
Servings: 2–3
Ingredients
- 1 pound zucchini (about 3 medium), coarsely grated (≈3 cups)
- ½ teaspoon kosher salt (or sea salt)
- 1 large egg, whisked
- ¼ cup crumbled feta cheese (or grated Mizithra or Parmesan)
- ½ cup all‑purpose flour + ¼ cup for dusting
- 3 green onions, finely sliced
- 1 teaspoon fresh parsley, minced
- 1 teaspoon fresh dill, minced
- ½ teaspoon lemon zest
- ¼ teaspoon black pepper
- 2–3 tablespoons extra virgin olive oil (or canola oil)
Instructions
- Place the grated zucchini in a bowl and sprinkle with the ½ teaspoon of salt; toss and let sit for about 10 minutes to draw out moisture.
- After resting, wrap the zucchini in a clean kitchen towel or paper towels and squeeze out as much liquid as possible.
- In a large bowl, combine the drained zucchini, whisked egg, crumbled feta, ½ cup flour, sliced green onions, parsley, dill, lemon zest, and black pepper; mix until well combined.
- Heat the olive oil in a large skillet over medium heat.
- Dust your hands with the remaining ¼ cup flour. Scoop about 2 tablespoons of the zucchini mixture and shape into small patties, lightly coating each with the dusted flour.
- Place the shaped fritters in the hot skillet without overcrowding; cook about 3–4 minutes per side until golden brown and crisp.
- Transfer cooked fritters to a paper towel‑lined plate to drain briefly.
- Repeat with the remaining batter, adding more oil to the skillet as needed.
- Serve warm with your favorite dip, yogurt, or a squeeze of lemon.
6. Grilled Lime Butter Corn
Grilled Lime Butter Corn is a simple, flavorful side that brings sweet corn to life with a squeeze of fresh lime and rich butter. The grill adds a light smoky char that makes this classic side feel special and fresh.
This dish is perfect for summer barbecues, weeknight dinners, or anytime you want a side that’s quick to prepare but full of flavor. The lime keeps the bright, juicy notes coming through while the butter adds smooth richness.
Every bite has a satisfying blend crisp grilled corn kernels with zesty lime and buttery goodness making this corn an easy favorite alongside grilled meats or on its own.
Servings: 2–4
Ingredients
- 4 ears of corn, husks removed
- 3 tablespoons unsalted butter, melted
- Juice of 1 lime
- Zest of 1 lime (optional)
- Salt, to taste
- Black pepper, to taste
- Optional: chopped cilantro or parsley for garnish
Instructions
- Preheat your grill to medium‑high heat.
- Brush each ear of corn with melted butter on all sides.
- Place the corn on the grill and cook for about 10–12 minutes, turning every few minutes, until the kernels are slightly charred and tender.
- Remove the grilled corn from the heat and place on a serving platter.
- Squeeze fresh lime juice evenly over all the ears of corn.
- Sprinkle with lime zest if using, followed by salt and black pepper to taste.
- Garnish with chopped cilantro or parsley if desired.
- Serve warm alongside your favorite main dishes.
7. Roasted Vegetable & Mushroom Hummus Bowl
Roasted Vegetable & Mushroom Hummus Bowl is a colorful, wholesome meal that brings together tender roasted veggies, rich mushrooms, and creamy hummus in a bowl you’ll want again and again. Each component brings a mix of textures and natural flavors that feel both hearty and fresh.
This bowl is great for lunch, light dinners, or casual gatherings when something nutrient‑packed and satisfying is needed without being too heavy. The roasted vegetables add sweetness and depth while the hummus keeps things smooth and rich.
With roasted carrots, zucchini, mushrooms, beets, baby potatoes, and tomatoes surrounding a generous scoop of hummus, every bite feels balanced and filling — perfect on its own or with warm bread or pita.
Servings: 2–3
Ingredients
- 1 cup baby bella mushrooms
- 2–3 carrots, peeled and cut into sticks
- 1–2 cups baby potatoes (or small red potatoes), halved
- 2–3 tablespoons olive oil
- Black pepper, to taste
- 1 cup hummus
- Optional garnish: fresh parsley or cilantro, lemon wedges
Instructions
- On a large baking sheet, arrange the mushrooms, zucchini, carrots, cherry tomatoes, and baby potatoes in separate sections or mixed together.
- Roast the vegetables in the preheated oven for about 20–25 minutes, stirring halfway, until they are tender and lightly browned.
- Remove the roasted vegetables from the oven and let cool slightly.
- Arrange the roasted vegetables and mushrooms around the hummus in sections or a circular pattern.
- Garnish with fresh parsley or cilantro and serve with lemon wedges if desired.
8. Frugal Bruschetta
Frugal Bruschetta is a simple and tasty appetizer that brings fresh tomatoes, herbs, and tangy balsamic together on crisp toasted bread. It’s a great way to make a flavorful bite with minimal ingredients that still feels bright and fresh.
This dish is perfect for casual gatherings, quick snacks, or as a starter before lunch or dinner. The juicy tomato mixture pairs beautifully with crunchy bread, making every bite feel satisfying and vibrant.
With its easy prep and natural flavors, this bruschetta is a go‑to option when something light, inexpensive, and delicious is wanted.
Servings: 6–8
Ingredients
- 1 baguette or rustic bread, sliced
- 3–4 ripe tomatoes, diced
- 1 small red onion, finely diced
- 2–3 cloves garlic, minced
- 2–3 tablespoons extra‑virgin olive oil
- 1–2 tablespoons balsamic vinegar or glaze
- ½ cup fresh basil, chopped
- Salt, to taste
- Black pepper, to taste
- Optional: grated Parmesan cheese
Instructions
- Preheat the oven to 375°F (190°C) or heat a grill pan.
- Lay the bread slices on a baking sheet and brush lightly with olive oil.
- Toast the bread in the oven for 8–10 minutes, until golden and crisp; remove and set aside.
- In a bowl, combine diced tomatoes, finely diced red onion, and minced garlic.
- Add the chopped fresh basil, olive oil, and balsamic vinegar; toss gently to mix.
- Season the tomato mixture with salt and black pepper to taste.
- Spoon the tomato mixture over each toasted bread slice.
- Drizzle with a little extra balsamic glaze if desired.
- Sprinkle optional grated Parmesan cheese over the top before serving.
9. Creamy Spinach Mushrooms
Creamy Spinach Mushrooms is a comforting, savory side dish that brings tender mushrooms and leafy spinach together in a rich, silky sauce. The earthy flavor of mushrooms balances beautifully with the freshness of spinach for a satisfying dish.
This recipe is perfect for breakfast, brunch, or as a side alongside grilled meats, chicken, or fish. It’s easy to make and feels cozy without being too heavy.
The creamy sauce wraps around each bite, creating a smooth texture that pairs well with toast, rice, pasta, or even roasted potatoes.
Servings: 2–3
Ingredients
- 2 tablespoons butter or olive oil
- 1 small onion, finely chopped
- 2–3 cloves garlic, minced
- 10–12 ounces mushrooms (button or cremini), sliced
- 3–4 cups fresh spinach
- ½ cup heavy cream or half‑and‑half
- ¼ cup grated Parmesan cheese
- Salt, to taste
- Black pepper, to taste
- Optional: pinch of red pepper flakes
Instructions
- Heat the butter or olive oil in a large skillet over medium heat.
- Add the chopped onion and sauté until softened, about 3–4 minutes.
- Add the minced garlic and cook for another 30 seconds until fragrant.
- Add the sliced mushrooms and cook until they release moisture and begin to brown, about 5–7 minutes.
- Stir in the fresh spinach and cook until wilted.
- Pour in the heavy cream or half‑and‑half and stir to combine with the vegetables.
- Add the grated Parmesan, salt, and black pepper; stir until the sauce thickens slightly and becomes creamy.
- Cook for another 2–3 minutes, then remove from heat.
- Serve warm as a side dish or over toast, pasta, or rice.
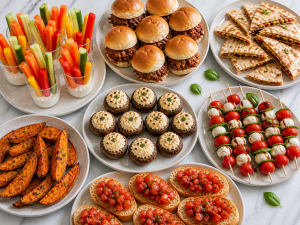
10. Chicken Parmesan Sliders
Mini Chicken Sliders are bite‑sized, crowd‑friendly sandwiches that combine tender chicken with melty cheese and flavorful sauce on soft slider buns. They’re perfect when a fun, handheld meal is wanted for gatherings, game day, or weeknight dinner with a twist.
These sliders work well for parties or casual meals because they’re easy to serve and easy to eat. The juicy chicken and cheesy topping give every bite a satisfying blend of textures and familiar flavors.
Soft buns and hearty filling make these sliders both tasty and filling, giving you a small but flavorful sandwich that’s enjoyable every time.
Servings: 6–8 sliders
Ingredients
- 1 lb cooked chicken, shredded or chopped
- 12 slider buns (mini rolls)
- 1 cup marinara or BBQ sauce
- 1 ½ cups shredded mozzarella or cheddar cheese
- 2 tablespoons butter, melted
- Optional: grated Parmesan, fresh parsley for garnish
- Optional add‑ins: diced onions, pickles, or coleslaw
Instructions
- Preheat the oven to 350°F (175°C).
- In a bowl, mix the cooked chicken with marinara or BBQ sauce until well coated.
- Slice the slider buns in half horizontally and arrange the bottom halves in a baking dish.
- Spread the saucy chicken mixture evenly over the bottom buns.
- Sprinkle shredded cheese over the chicken layer.
- Place the top halves of the slider buns on top of the cheese.
- Brush the tops of the buns with melted butter.
- Bake in the oven for 12–15 minutes until the cheese is melted and the sliders are heated through.
- Remove from the oven and sprinkle with grated Parmesan and fresh parsley if desired.
- Serve warm with your favorite sides or dipping sauce.

hi there,
i’m Noah
A California-born food blogger behind Freshman Cook, whose culinary journey began in his tiny apartment kitchen.