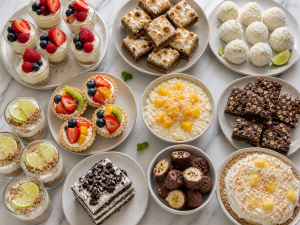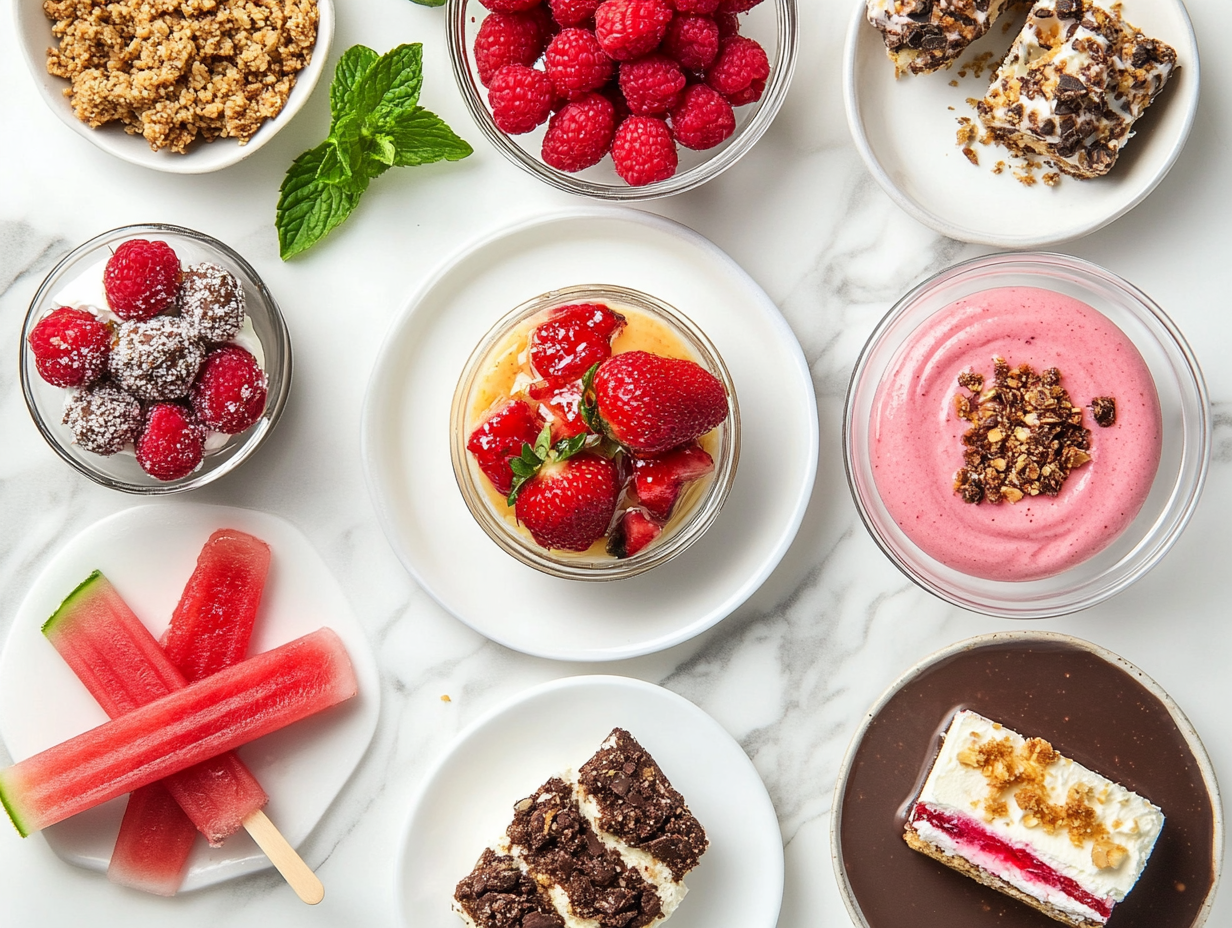
Summer desserts should be light, cool, and packed with fresh flavors. Whether you’re lounging by the pool or hosting a gathering, these desserts are perfect for satisfying your sweet tooth while keeping things refreshing and simple.
From fruity popsicles to creamy parfaits, these recipes are made with seasonal fruits and simple ingredients that highlight the best of summer. They’re easy to make, delicious to eat, and perfect for warm weather.
This collection of summer desserts features a variety of sweet treats, from frozen delights to fresh fruit-based options, ideal for enjoying on sunny days.
1. Strawberry lemon blondies
Strawberry Lemon Blondies are a bright and tasty dessert that combines juicy strawberries with zesty lemon in a soft, buttery blondie base. The fruity swirls and citrus notes make these squares feel fresh and flavorful without being too sweet.
These blondies are great for dessert tables, afternoon treats, or whenever a cheerful, fruit‑filled sweet is wanted. The combination of strawberry and lemon makes each bite feel light and summery.
With a soft, tender texture and a glossy lemon‑strawberry glaze on top, these blondies are as delightful to look at as they are to eat.
Servings: 9–12 blondies
Ingredients
For the Blondies:
- 1 cup (2 sticks) unsalted butter, melted and slightly cooled
- 1 cup granulated sugar
- 1/2 cup brown sugar, packed
- 2 large eggs
- 2 teaspoons vanilla extract
- Zest of 1 lemon
- 2 tablespoons fresh lemon juice
- 2 cups all‑purpose flour
- 1 teaspoon baking powder
- 1/2 teaspoon salt
- 1–1½ cups fresh strawberries, hulled and chopped
For the Glaze:
- 1–1½ cups powdered sugar
- 1–2 tablespoons fresh lemon juice
- 2–3 tablespoons finely mashed strawberries (optional, for color and flavor)
Instructions
- Preheat the oven to 350°F (175°C). Grease a 9×9‑inch baking pan or line it with parchment paper.
- In a large bowl, whisk together the melted butter, granulated sugar, and brown sugar until smooth.
- Add the eggs one at a time, beating well after each addition. Stir in the vanilla extract, lemon zest, and lemon juice.
- In a separate bowl, whisk together the flour, baking powder, and salt.
- Gradually add the dry ingredients to the wet mixture, stirring until just combined. Do not overmix.
- Gently fold in the chopped strawberries.
- Pour the batter into the prepared pan and spread it evenly.
- Bake for 25–30 minutes, or until the edges are golden and a toothpick inserted into the center comes out clean or with just a few crumbs.
- Remove the blondies from the oven and let them cool completely in the pan.
- While the blondies cool, make the glaze: whisk together powdered sugar and lemon juice until smooth; add mashed strawberries if desired for extra color and flavor.
- Pour or drizzle the glaze over the cooled blondies and spread to cover.
- Let the glaze set before cutting into squares. Serve and enjoy.
2. Watermelon Popsicles
Watermelon Popsicles are a refreshing, icy treat that’s especially nice on warm days or after outdoor activities. Made with juicy watermelon and a hint of lemon and honey, they feel light and naturally sweet.
These popsicles are great when you want a simple homemade dessert or snack without any artificial ingredients. The watermelon puree freezes into a smooth, fruity pop that’s cool and satisfying.
With just a few ingredients and an easy prep, this recipe turns fresh fruit into a fun and healthy frozen treat everyone can enjoy.
Servings: 4–6 popsicles
Ingredients
- 1½ cups seedless watermelon, diced
- ½ cup water
- 1 tablespoon honey
- 1 tablespoon fresh lemon juice
- 1 tablespoon white sugar (or to taste)
Instructions
- Add the diced watermelon and water to a blender.
- Blend until the mixture is smooth and liquid.
- Add the honey, lemon juice, and sugar to the blender and pulse a few times to combine.
- Taste and add more honey or sugar if you want it sweeter.
- Pour the mixture evenly into popsicle molds.
- Insert sticks and freeze for at least 4–6 hours, or until completely solid.
- To unmold, run warm water briefly over the outside of the molds.
- Serve immediately and enjoy your refreshing watermelon popsicles.
3. Raspberry Filled Chocolate Bites
Raspberry Filled Chocolate Bites are a sweet, fruity treat that pairs juicy raspberries with rich dark chocolate. They feel light, refreshing, and just the right amount of sweet perfect when you want a simple dessert or snack.
This recipe works well as a quick homemade sweet bite for parties, afternoon cravings, or when you want something chocolatey without heavy baking. The raspberry filling balances the chocolate and adds a fresh fruit twist.
With only a few ingredients and easy steps, these bites are a fun way to enjoy dark chocolate with a burst of raspberry inside every piece.
Servings: 12–15 bites
Ingredients
- 1 heaping cup fresh raspberries
- 1 tablespoon chia seeds
- 1 tablespoon raw honey or pure maple syrup
- 1 cup dark chocolate chips
Instructions
- In a small bowl, combine the raspberries, chia seeds, and raw honey (or maple syrup). Gently mash the raspberries with a fork until the chia seeds are well mixed and the mixture is slightly thickened.
- Line a small tray or plate with parchment paper and place heaping teaspoon‑sized dollops of the raspberry mixture spaced apart; freeze for about 15–20 minutes to firm up.
- In a microwave‑safe bowl, heat the dark chocolate chips in 20‑second intervals, stirring between each, until fully melted and smooth.
- Remove the tray with raspberry dollops from the freezer.
- Using a fork or skewer, dip each raspberry mound into the melted chocolate, coating completely. Allow excess chocolate to drip off.
- Place each chocolate‑coated raspberry onto the parchment paper.
- Repeat until all raspberry pieces are coated in chocolate.
- Freeze the coated bites for another 10–15 minutes to let the chocolate set.
- Serve chilled or store in an airtight container in the fridge.
4. Lemon, Cashew and Coconut Energy Balls
Lemon, Cashew & Coconut Energy Balls are zesty, wholesome bites that pair bright citrus with naturally sweet dates and creamy cashews. These little energy balls feel fresh and satisfying — perfect for when you want a healthy snack that still tastes delicious.
They’re great for breakfast on the go, post‑workout fuel, or a quick afternoon pick‑me‑up. With simple, unprocessed ingredients, they offer a balance of healthy fats, fiber, and natural sweetness without refined sugar.
The hint of lemon and the coconut coating make these energy balls feel light and refreshing, turning a quick snack into something you look forward to eating.
Servings: 12–15 balls
Ingredients
- 180 g Medjool dates (about 9–10 dates), pitted
- 1¼ cups raw cashews
- ½ cup desiccated coconut
- ½ cup vanilla or unflavored protein powder (or quick oats can be substituted)
- 2 tablespoons chia seeds
- Zest of 1 lemon
- ½ teaspoon salt
- 2 teaspoons vanilla extract (optional)
Extra:
- ½ cup desiccated coconut, for rolling
Instructions
- Place the raw cashews in a food processor and pulse until finely chopped.
- Add the pitted Medjool dates, desiccated coconut, protein powder (or quick oats), chia seeds, lemon zest, salt, and vanilla extract (if using).
- Process the mixture until it starts to come together into a sticky dough. If it seems too dry, add a teaspoon of water and pulse again until it holds.
- Scoop about 1–1½ tablespoons of the mixture and roll it between your palms to form a ball.
- Roll each formed ball in the extra desiccated coconut to coat the outside.
- Place the coconut‑coated energy balls on a plate or tray and chill in the fridge for at least 20–30 minutes to firm up.
- Store in an airtight container in the refrigerator for up to 1 week.
5. Strawberry Cheesecake Jars
Strawberry Cheesecake Jars are a delightful dessert that layers creamy sweet cheesecake filling with juicy strawberries and a crunchy graham cracker base. Each jar feels like an individual serving of classic strawberry cheesecake rich, fruity, and fun to eat.
This dessert works well for parties, date nights, brunches, or anytime a no‑bake sweet treat is wanted without much fuss. The combination of textures smooth, crunchy, and juicy keeps every spoonful interesting.
With fresh strawberries and light, creamy layers, these cheesecake jars offer a refreshing, balanced sweetness that’s perfect on warm days or as a simple end to any meal.
Servings: 4–6 small jars
Ingredients
For the crust:
- 1½ cups graham cracker crumbs
- 3 tablespoons sugar
- 6 tablespoons unsalted butter, melted
For the cheesecake filling:
- 8 ounces cream cheese, softened
- ½ cup powdered sugar
- 1 teaspoon vanilla extract
- ¾ cup heavy whipping cream
For the strawberry layer:
- 1–1½ cups fresh strawberries, hulled and sliced
- 2–3 tablespoons sugar (to taste)
- Juice of ½ lemon (optional, for brightness)
For serving:
- Fresh strawberry slices
- Optional: whipped cream
Instructions
- Chill the jars in the refrigerator for at least 1–2 hours before serving.
- In a medium bowl, combine graham cracker crumbs, sugar, and melted butter. Stir until evenly moistened.
- Divide the crumb mixture among the jars, pressing firmly into the bottom to form a crust layer. Set aside.
- In a bowl, toss the sliced strawberries with sugar and lemon juice (if using). Let sit for 10–15 minutes to macerate and release juices.
- In a mixing bowl, beat the softened cream cheese, powdered sugar, and vanilla until smooth.
- In a separate bowl, whip the heavy cream until stiff peaks form.
- Gently fold the whipped cream into the cream cheese mixture until well combined and fluffy.
- Spoon or pipe a layer of cheesecake filling over the graham crust in each jar.
- Add a layer of the macerated strawberries on top of the cheesecake.
- Finish with extra fresh strawberries or a dollop of whipped cream on top if desired.
6. Dark Chocolate Avocado Mousse
Dark Chocolate Avocado Mousse is a rich, creamy dessert that’s dairy‑free and packed with healthy fats. The smooth avocado creates a velvety texture while the cocoa powder brings deep chocolate flavor in every spoonful.
This dessert is perfect when you want something sweet without heavy ingredients or long prep. It comes together quickly in a blender and feels satisfying without being overly rich.
With a hint of vanilla and natural sweetness, this mousse is great on its own or dressed up with a dollop of whipped coconut cream for an extra treat.
Servings: 2–3
Ingredients
- 1 ripe avocado
- 1 cup unsweetened cocoa powder
- ¼ cup maple syrup or honey
- ¼ cup milk of choice (almond, oat, dairy, etc.)
- 1 teaspoon vanilla extract
- Optional: whipped coconut cream and grated chocolate for garnish
Instructions
- Cut the ripe avocado in half, remove the pit, and scoop the flesh into a blender or food processor.
- Add the unsweetened cocoa powder, maple syrup (or honey), milk of choice, and vanilla extract to the blender with the avocado.
- Blend on high until the mixture becomes smooth and creamy, stopping to scrape down the sides as needed.
- Taste the mousse and add a little more sweetener or milk if desired for a sweeter or lighter texture; blend again to combine.
- Spoon the mousse into serving dishes or small jars.
- Chill in the refrigerator for at least 30 minutes to let the flavors meld and the mousse set.
- Before serving, top with a dollop of whipped coconut cream and sprinkle with grated chocolate if desired.
- Serve chilled and enjoy your dark chocolate avocado mousse.
7. Amaretto Peach Crisp
Amaretto Peach Crisp is a warm, comforting dessert that brings together juicy fresh peaches with a crunchy, buttery topping. The addition of amaretto liqueur gives the fruit filling a hint of almond‑like warmth that pairs beautifully with sweet peaches.
This dessert is perfect for cozy evenings, weekend gatherings, or any time you want a fruit‑forward treat that feels just a little special. The contrast between soft fruit and crisp topping makes every bite satisfying.
Served warm with a scoop of ice cream or a dollop of whipped cream, this crisp feels like a classic favorite with a subtle twist that keeps it memorable.
Servings: 6–8
Ingredients
For the Peach Filling:
- Fresh peaches (about 6–8 peaches, peeled and sliced)
- 2–3 tablespoons all‑purpose flour
- ¼–½ cup granulated sugar (to taste)
- 1–2 tablespoons fresh lemon juice
- 1 teaspoon vanilla extract
- 1–2 tablespoons amaretto liqueur
- Pinch of salt
For the Crisp Topping:
- ½ cup light brown sugar
- ½ cup all‑purpose flour
- ½ cup old‑fashioned oats
- ½ cup sliced almonds
- 1 teaspoon ground cinnamon
- Pinch of salt
- ½ cup unsalted butter, very cold and cut into small cubes
Instructions
- Preheat the oven to 350°F (175°C) and lightly grease a baking dish.
- In a large bowl, combine the sliced peaches, flour, granulated sugar, lemon juice, vanilla extract, amaretto liqueur, and a pinch of salt. Toss gently to coat the peaches evenly.
- Pour the peach mixture into the prepared baking dish and spread it out in an even layer.
- In another bowl, mix together the brown sugar, flour, old‑fashioned oats, sliced almonds, ground cinnamon, and a pinch of salt for the crisp topping.
- Sprinkle the crisp topping evenly over the peaches in the baking dish.
- Remove from the oven and let cool slightly before serving.
8. No Bake Coconut Cream Pie
No Bake Coconut Cream Pie is a cool, creamy dessert that feels like a tropical treat without turning on the oven. The rich coconut filling is smooth and comforting, balanced by a crunchy graham crumb crust that gives every spoonful great texture.
This dessert is perfect for warm weather, family gatherings, potlucks, or anytime you want an easy but impressive sweet finish. Because it’s no‑bake, it comes together quickly and stays light yet satisfying.
Servings: 8–10
Ingredients
For the crust:
- 2 cups coconut milk (full fat)
- 1 cup heavy cream
- ½ cup sugar
- ¼ cup cornstarch
- 1 teaspoon vanilla extract
- 1½ cups sweetened shredded coconut
- Pinch of salt
For the topping:
- 1 cup whipped cream
- Toasted coconut flakes (for garnish)
Instructions
- In a medium bowl, combine the graham cracker crumbs, sugar (if using), and melted butter. Stir until the crumbs are evenly coated and look like wet sand.
- Press the crumb mixture firmly into the bottom and up the sides of a 9‑inch pie pan to form the crust. Refrigerate while you prepare the filling.
- In a saucepan, whisk together the coconut milk, heavy cream, sugar, cornstarch, and a pinch of salt. Place over medium heat and cook, whisking constantly.
- Once the mixture begins to thicken and bubble, continue whisking for another 1–2 minutes until it becomes very thick and creamy.
- Remove from heat and stir in the vanilla extract and shredded coconut.
- Pour the warm filling into the chilled graham cracker crust, spreading it evenly.
- Smooth the top with a spatula and let it cool to room temperature, then refrigerate for at least 4 hours or until completely set.
- Before serving, spread whipped cream over the top of the pie.
- Sprinkle toasted coconut flakes on top for garnish.
- Slice and serve chilled.

hi there,
i’m Noah
A California-born food blogger behind Freshman Cook, whose culinary journey began in his tiny apartment kitchen.