There are so many foods that are symbolic of Halloween, and one of them is Candy Corn. Did you know that the tiny white, orange and yellow piece of candy has been around over 100 years? That’s some staying power, and my inspiration to make these Candy Corn Cookies to celebrate Halloween Finger Food with Sunday Supper!
 Candy Corn Cookies
(printable recipe at end of page)
(makes 5 dozen cookies)
Cookies
2 cups Butter
2 cups Sugar
2 Eggs
2 teaspoon Vanilla or Almond Extract
2 1/2 cups Flour
1 1/2 teaspoons Baking Powder
1/2 teaspoon Salt
Candy Corn Cookie Cutter
Orange Food Coloring
Chocolate Jimmies
Royal Icing
3/4 cup Warm Water
5 tablespoons Meringue Powder
1 teaspoon Cream of Tartar
2.25 pounds Confectioners Sugar
Yellow Food Coloring 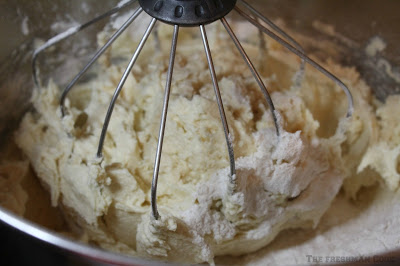 Cream butter and sugar until light and fluffy. Add eggs and extract and mix well. Mix dry ingredients together. Add dry ingredients to wet ingredients, a little at a time. Mix until flour is incorporated and dough comes together. Add orange coloring and incorporate into dough.

Divide dough into small batches that will fit between a large piece of parchment paper. Roll out dough to desired thickness. This recipe will take approx. 6-7 pieces of parchment paper.
Stack the parchment paper covering the cookie dough on to a baking sheet, cover tightly with saran wrap, and let it chill in the fridge. Repeat the process until all dough is used, and all the sheets of parchment are in the fridge. By the time you are done, the first sheet you put in should be cold. If not, wait about 30 minutes.

Take out the first sheet, cut out, and start baking at 350 degrees for 8-10 minutes. The best thing is that you are not adding any additional flour to your cookies. When you have used all of the dough from one sheet that you can, re-roll it and place on the same parchment paper again. Refrigerate like when you started. Keep cooking until all cookies are done.

Use a whisk to mix together the warm water and meringue powder in a large mixing bowl or stand mixer. Mix for 30 seconds. Add Cream of Tartar and mix for 30 seconds more. Add confectioner’s sugar and mix for 10 minutes on low speed. Take some of the icing and tint it a yellow color like the candy corn color.

Use the white color to outline and fill in the top tip of the candy corn cookie. Use the yellow to fill in the bottom area of the candy corn cookie. Add chocolate sprinkles, or whatever type of decorative sprinkle you want.

Author: The Freshman Cook
Cookies
- 2 cups Butter
- 2 cups Sugar
- 2 Eggs
- 2 teaspoon Vanilla or Almond Extract
- 2 1/2 cups Flour
- 1 1/2 teaspoons Baking Powder
- 1/2 teaspoon Salt
- Candy Corn Cookie Cutter
- Orange Food Coloring
- Chocolate Jimmies
Royal Icing
- 3/4 cup Warm Water
- 5 tablespoons Meringue Powder
- 1 teaspoon Cream of Tartar
- 2.25 pounds Confectioners Sugar
- Yellow Food Coloring
- Cream butter and sugar until light and fluffy. Add eggs and extract and mix well. Mix dry ingredients together. Add dry ingredients to wet ingredients, a little at a time. Mix until flour is incorporated and dough comes together. Add orange coloring and incorporate into dough.
- Divide dough into small batches that will fit between a large piece of parchment paper. Roll out dough to desired thickness. This recipe will take approx. 6-7 pieces of parchment paper. Stack the parchment paper covering the cookie dough on to a baking sheet, cover tightly with saran wrap, and let it chill in the fridge. Repeat the process until all dough is used, and all the sheets of parchment are in the fridge. By the time you are done, the first sheet you put in should be cold. If not, wait about 30 minutes.
- Take out the first sheet, cut out, and start baking at 350 degrees for 8-10 minutes. The best thing is that you are not adding any additional flour to your cookies. When you have used all of the dough from one sheet that you can, re-roll it and place on the same parchment paper again. Refrigerate like when you started. Keep cooking until all cookies are done.
- Use a whisk to mix together the warm water and meringue powder in a large mixing bowl or stand mixer. Mix for 30 seconds. Add Cream of Tartar and mix for 30 seconds more. Add confectioner’s sugar and mix for 10 minutes on low speed. Take some of the icing and tint it a yellow color like the candy corn color.
- Use the white color to outline and fill in the top tip of the candy corn cookie. Use the yellow to fill in the bottom area of the candy corn cookie. Add chocolate sprinkles, or whatever type of decorative sprinkle you want.