Sometimes, the best recipes are the ones you don’t have to cook. No-bake peanut butter bars are my go-to when I want something sweet and satisfying without turning on the stove. It’s just a melting, mixing, pouring kind of process, honest and straightforward.
This recipe feels like a warm hug—childhood memories of sticky fingers and peanut butter sandwiches. But it also fits into my busy life, giving me a moment of calm and a treat that’s ready in less than an hour. No oven, no fuss, just real ingredients and a bit of patience.
The Unlikely Joy of No-Bake Confections—A Cook’s Notes on Simplicity and Comfort
Why I Keep Coming Back to This Simple Dessert
- I love how these bars come together so quickly, especially after a long day.
- There’s a nostalgic joy in biting into something sweet that’s also deeply familiar.
- Sometimes I add a pinch of sea salt on top for that perfect sweet-salty contrast.
- I take pride in how versatile this recipe is—swap ingredients, add toppings, make it your own.
A Personal Tale of Simplicity and Comfort
This recipe was born out of a need for a quick, satisfying treat without heating up the kitchen. I was craving something peanutty and chocolatey, but I didn’t want to wait or mess with the oven. Over the years, I’ve tweaked the ingredients—more honey, a splash of vanilla, a sprinkle of sea salt—each change bringing a new layer of flavor. It’s one of those recipes that feels both familiar and fresh, a little messy but always rewarding.
A Brief History of Peanut Butter Bars
- Inspired by childhood, but adapted for quick, no-fuss treats.
- Uses pantry staples, making it a go-to for last-minute dessert emergencies.
- Chocolate topping became a favorite addition after a messy experiment with melted chocolate.
Ingredient insights for perfect bars

- Peanut Butter: I prefer creamy, but chunky adds more texture—try both to see what you like. Its richness is the base of these bars.
- Honey: The glue that holds it together, adding sweetness and a slight floral note. Swap with maple syrup for a different flavor profile.
- Chocolate Chips: I love semi-sweet for balance, but dark or even white chocolate can change the mood entirely. Melts smoothly and coats beautifully.
- Graham Crackers: They give structure and a subtle toasty flavor. You can swap with crushed digestive biscuits or even crushed cookies.
- Oats: They add chew and bulk. Rolled oats are best, but quick oats work in a pinch—just don’t overmix to keep some texture.
Spotlight on Peanut Butter and Chocolate
Chocolate Chips:
- Peanut Butter: Its oily, sticky nature makes it perfect for binding; watch for separation in natural types.
- It melts into a glossy sheen when heated—use that to your advantage during mixing.
Gourmet or regular chocolate chips:
- Chocolate Chips: They melt into a smooth, shiny layer, adding richness and a slight crunch.
- Keep some aside to sprinkle on top for texture and visual appeal.
Substitutions to suit your diet or pantry
- Dairy-Free: Use coconut oil or coconut butter instead of butter in the chocolate layer for creaminess.
- Gluten-Free: Substitute gluten-free graham crackers or crushed gluten-free cookies.
- Vegan: Swap honey with maple syrup or agave for sweetness.
- Nut-Free: Use sunflower seed butter instead of peanut butter for allergy-friendly options.
- Sweetener: Use agave syrup or coconut nectar in place of honey for different flavor notes.
Equipment & Tools
- Mixing bowls: For melting and mixing ingredients
- Spatula: To press mixture into pan and spread chocolate
- Microwave or double boiler: For melting chocolate
- 8×8-inch pan: To hold and set the bars
Step-by-step guide to perfect no-bake peanut butter bars
- Line an 8×8-inch pan with parchment paper, leaving some overhang for easy lifting.
- In a microwave-safe bowl, melt 1 cup of peanut butter with 1/4 cup honey (about 30 seconds). Stir until smooth.
- Add 1 1/2 cups crushed graham crackers, 1/2 cup rolled oats, and a pinch of salt to the melted mixture. Mix well.
- Press the mixture evenly into the prepared pan using a spatula or your fingers. Chill for 30 minutes.
- In a small saucepan, melt 1 cup chocolate chips over low heat (about 2-3 minutes), stirring until smooth.
- Pour the melted chocolate over the chilled peanut butter mixture, spreading evenly.
- Refrigerate for at least 2 hours until firm. For best results, let it sit at room temperature for 10 minutes before slicing.
Let the bars rest in the fridge for at least 2 hours. Slice into squares and serve directly from the fridge or at room temperature.
How to Know It’s Done
- Chocolate layer is glossy and set, not shiny or sticky.
- Bars are firm enough to hold shape when sliced.
- Peanut butter base feels dense but not crumbly, slightly sticky to the touch.
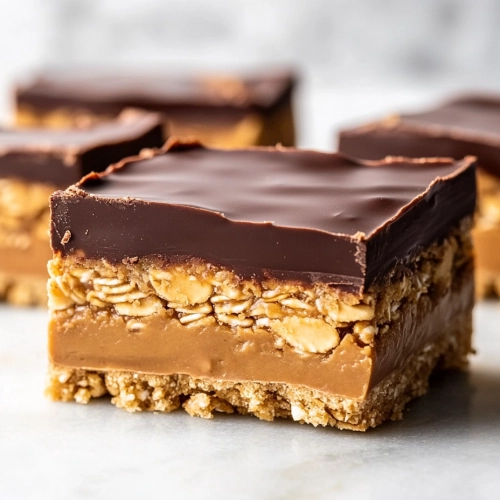
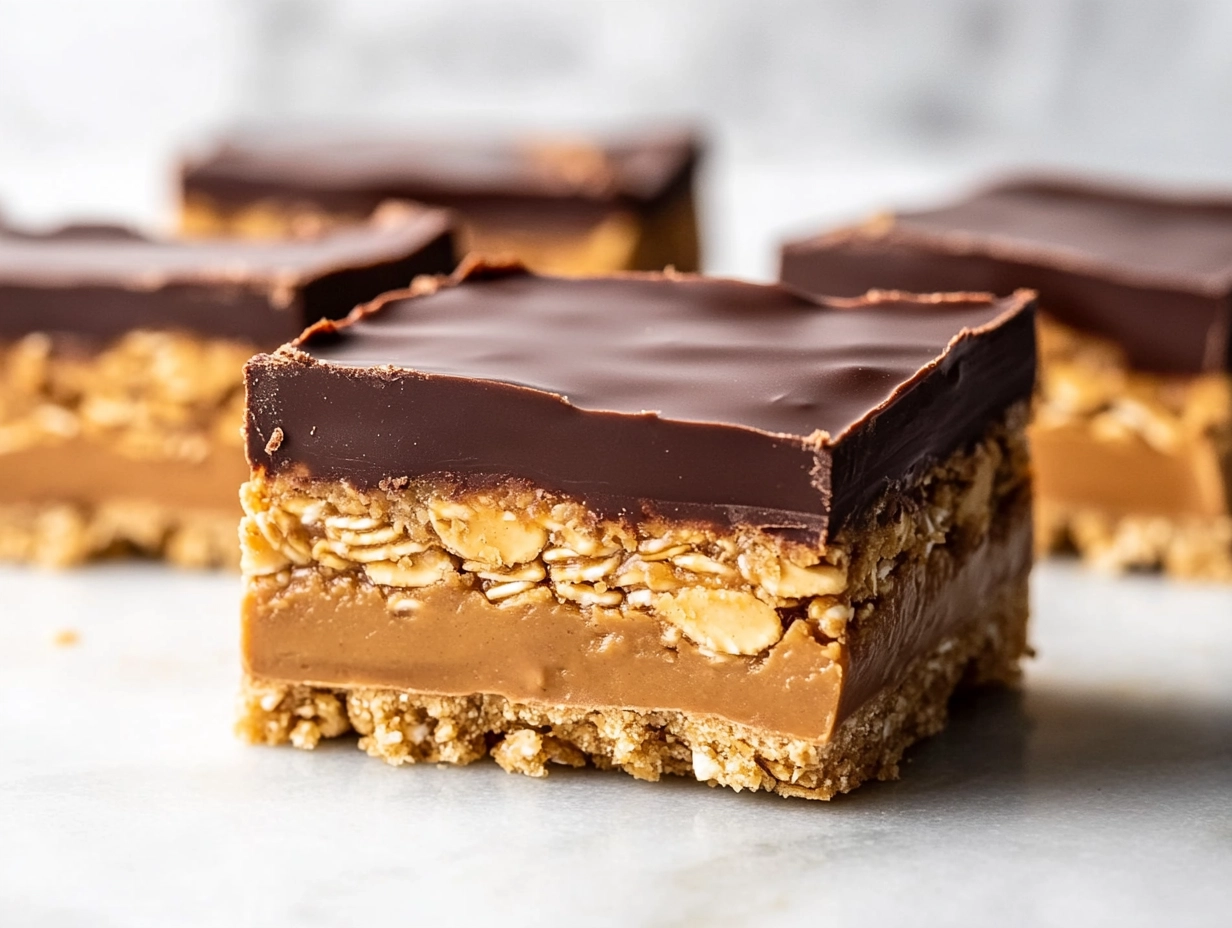
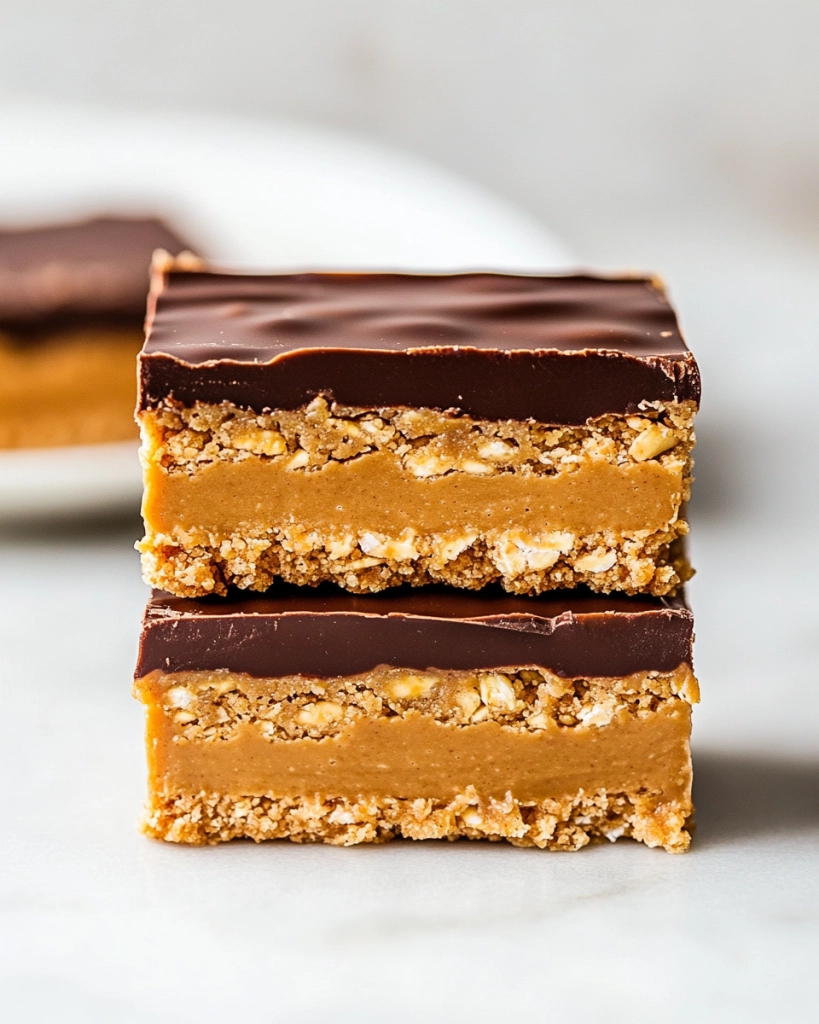
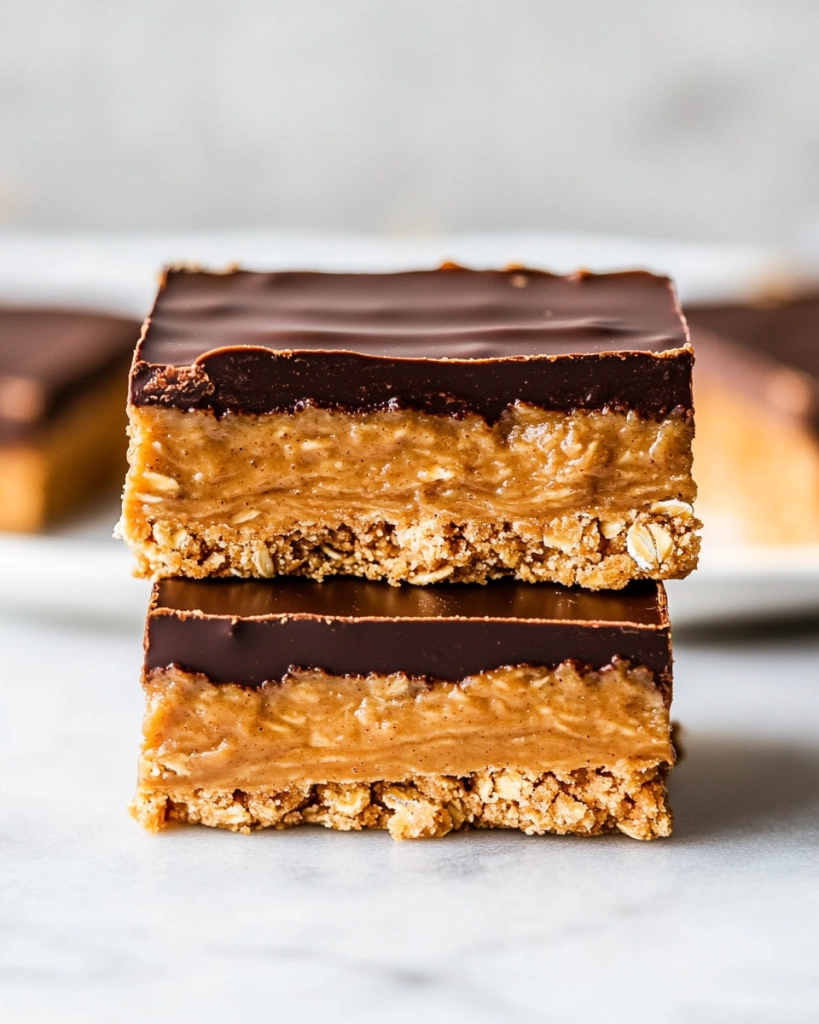
No-Bake Peanut Butter Bars
Equipment
- Mixing bowls
- Spatula
- Microwave or double boiler
- 8×8-inch pan
Ingredients
- 1 cup creamy peanut butter
- 1/4 cup honey
- 1 1/2 cups crushed graham crackers
- 1/2 cup rolled oats
- 1 cup semi-sweet chocolate chips
Instructions
- Line your 8×8-inch pan with parchment paper, leaving some overhang for easy removal.
- In a microwave-safe bowl, melt the peanut butter and honey together in short bursts of about 30 seconds, stirring between each until smooth and fragrant.
- Add the crushed graham crackers, oats, and a pinch of salt into the melted mixture, and stir thoroughly until everything is evenly coated and sticky.
- Press the mixture evenly into the prepared pan using a spatula or your fingers, smoothing the top for an even layer. Chill in the refrigerator for about 30 minutes to firm up.
- While the base chills, melt the chocolate chips in a small saucepan over low heat, stirring constantly until glossy and smooth, or melt in short bursts in the microwave.
- Pour the melted chocolate over the chilled peanut butter layer, spreading it evenly with a spatula to create a smooth, shiny top.
- Refrigerate the assembled bars for at least 2 hours, or until the chocolate is set and the bars are firm. For best results, let them sit at room temperature for 10 minutes before slicing.
- Use the parchment overhang to lift the bars out of the pan, then slice into squares with a sharp knife. Serve immediately or store in an airtight container in the fridge.
Tips and tricks for perfect no-bake bars
- Use fresh, crunchy peanut butter for the best flavor and texture.
- Chill the mixture before pressing into the pan to prevent sticking.
- Stir melted chocolate frequently to prevent burning or seizing.
- Add a pinch of sea salt on top of the chocolate for enhanced flavor.
- For an extra crunch, sprinkle chopped peanuts or pretzels before chilling.
Common mistakes and how to fix them
- FORGOT TO CHILL? → Place the bars in the freezer for 30 minutes to firm up quickly.
- DUMPED TOO MUCH CHOCOLATE? → Spread it thin and even, then chill again to set.
- OVER-TORCHED CHOCOLATE? → Add a teaspoon of vegetable oil and stir until smooth.
- MIXTURE TOO DRY? → Mix in a splash more honey or peanut butter to moisten.
Quick fixes for common issues
- When the chocolate is too thick, warm it slightly or add a tiny splash of coconut oil.
- Splash a little hot water into the melted chocolate if it’s too stiff to spread.
- Patch a sticky bottom by sprinkling a little more crushed graham crackers.
- Shield the bars from moisture—wrap tightly if not eating immediately.
- When bars crack or crumble, refrigerate longer or press more firmly during assembly.
What to Serve With No-Bake Peanut Butter Bars
Preparing and storing your peanut butter bars
- Prepare the base and refrigerate for up to 2 days before adding the chocolate layer.
- Wrap the finished bars tightly in plastic wrap or store in an airtight container.
- Freeze for up to a month; thaw at room temperature for 15 minutes before slicing.
- Chocolate topping can sometimes develop a white streak (fat bloom) after storage, but it’s still delicious.
10 Practical Q&As About No-Bake Peanut Butter Bars
1. Can I use natural peanut butter?
Use a good quality creamy peanut butter for the best flavor and texture. Natural ones work well too, just stir well before measuring.
2. Is natural peanut butter okay?
Yes, but keep in mind natural peanut butter may be thinner. You might need a touch more honey or a little less oil.
3. Can I substitute honey?
You can swap honey for maple syrup or agave, but expect a slightly different sweetness and flavor.
4. What kind of chocolate should I use?
Chocolate chips melt easily, so stir until smooth. Using semi-sweet or dark chocolate gives a richer flavor.
5. Can I add toppings?
For a crunch, sprinkle some chopped toasted peanuts on top before chilling. It adds texture and nuttiness.
6. How long should I chill it?
Keep the mixture chilled for at least 2 hours so it firms up enough to cut cleanly.
7. What size pan should I use?
Use a small, square pan (8×8 inches) for thicker bars. Line it with parchment for easy removal.
8. How do I store leftovers?
Store in an airtight container in the fridge for up to a week or freeze for longer.
9. They’re too sticky, what do I do?
If the bars are too sticky, add a little more crushed graham crackers or oats to the mixture.
10. Can I double the recipe?
Yes, you can make a double batch. Just make sure your pan and fridge space are big enough.
Once set, these bars are firm but chewy, with that unmistakable peanut butter richness and a glossy chocolate top. They’re perfect for sharing or stashing away for a sudden sweet craving.
In a way, these bars remind me that sometimes, the simplest things are the most comforting. No fuss, no wait, just good, honest flavors. And that’s what I keep coming back to.
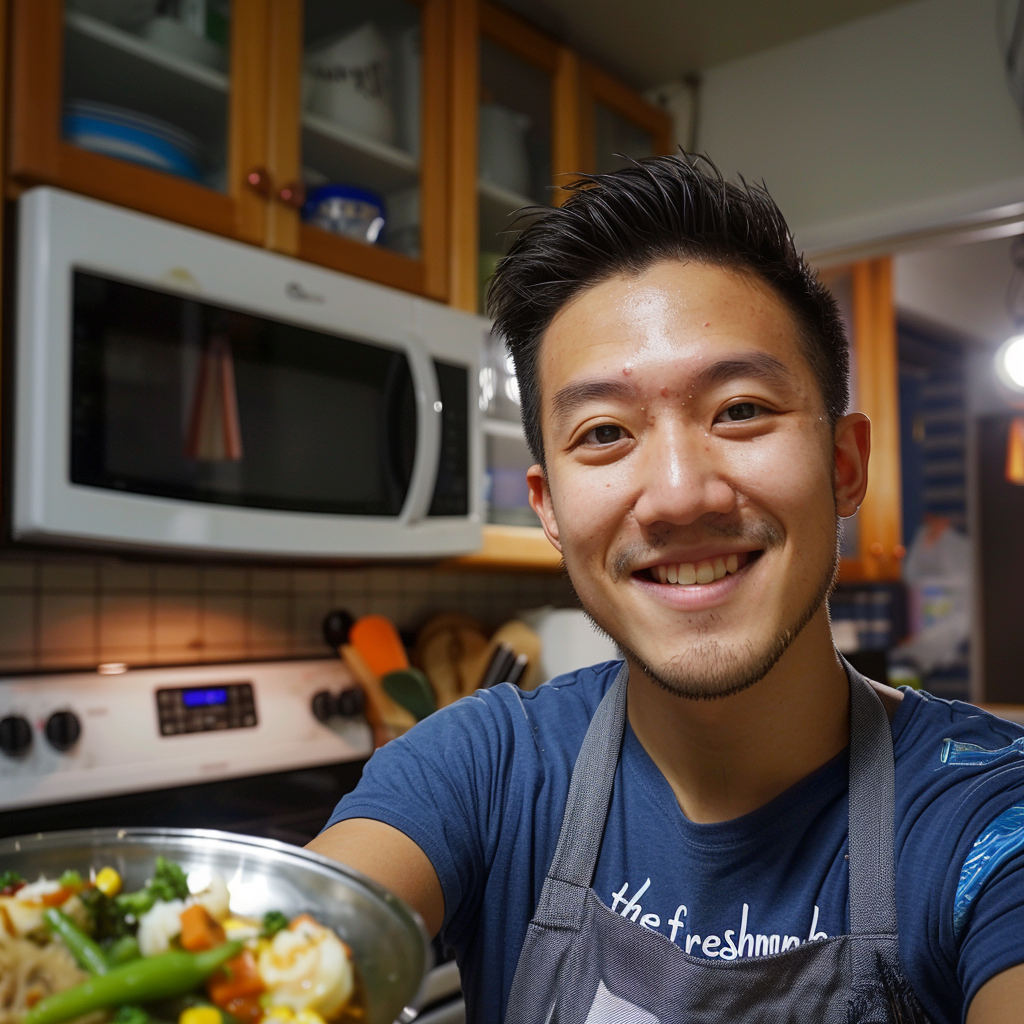
hi there,
i’m Noah
A California-born food blogger behind Freshman Cook, whose culinary journey began in his tiny apartment kitchen.